Otto Table Lamp Important Info

Congrats on your new table lamp! Below are a few tips and important info to keep your lamp lasting as long as possible!


1: Unbox Your Table Lamp

A smart speaker on a wall with an illustrated box below emitting sparkles and stars.

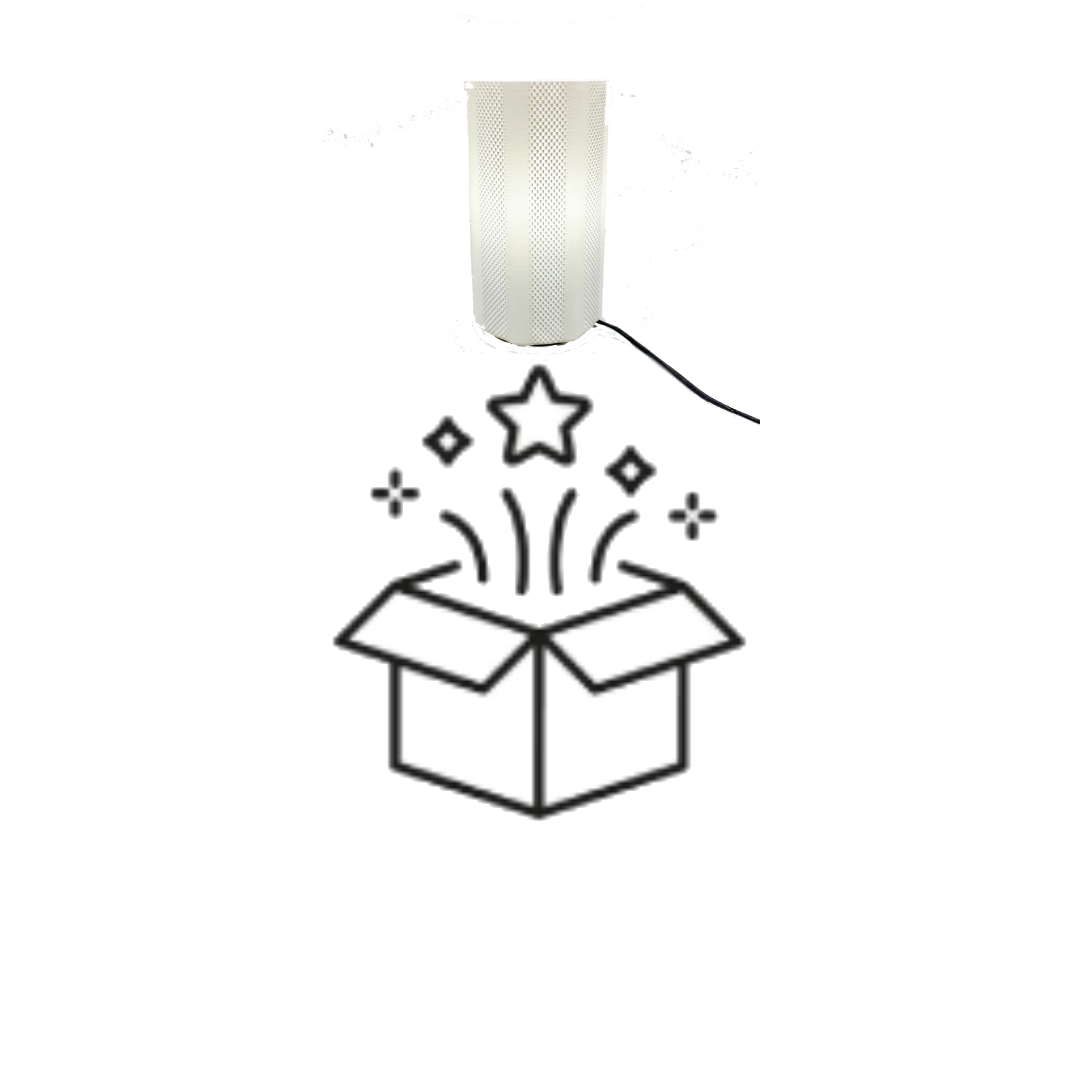
Be careful when unboxing, we pack everything in there well to ensure nothing happens to it during shipping.


2: Screw Lamp Cover Onto Base

A black mounting bracket connected to a black cable, with a large white cylindrical object with a textured surface above it.

Screw the base of the lampshade onto the base of the lamp. The base is threaded, so it can lock on and hide the internal lamp components.


3: Screw In Bulb From Top Of Lamp

An LED light bulb being inserted into a white, textured, conical lamp shade with a black socket inside.

Screw in the lightbulb from the top of the lampshade. Once you get some resistance, stop screwing it on. Don’t overtighten! It could start messing up the internal cables!


4: Plug In Cable And Flip The Switch

Close-up of a black electrical cord with a switch, plugged into an outlet, against a background of yellow and gray.

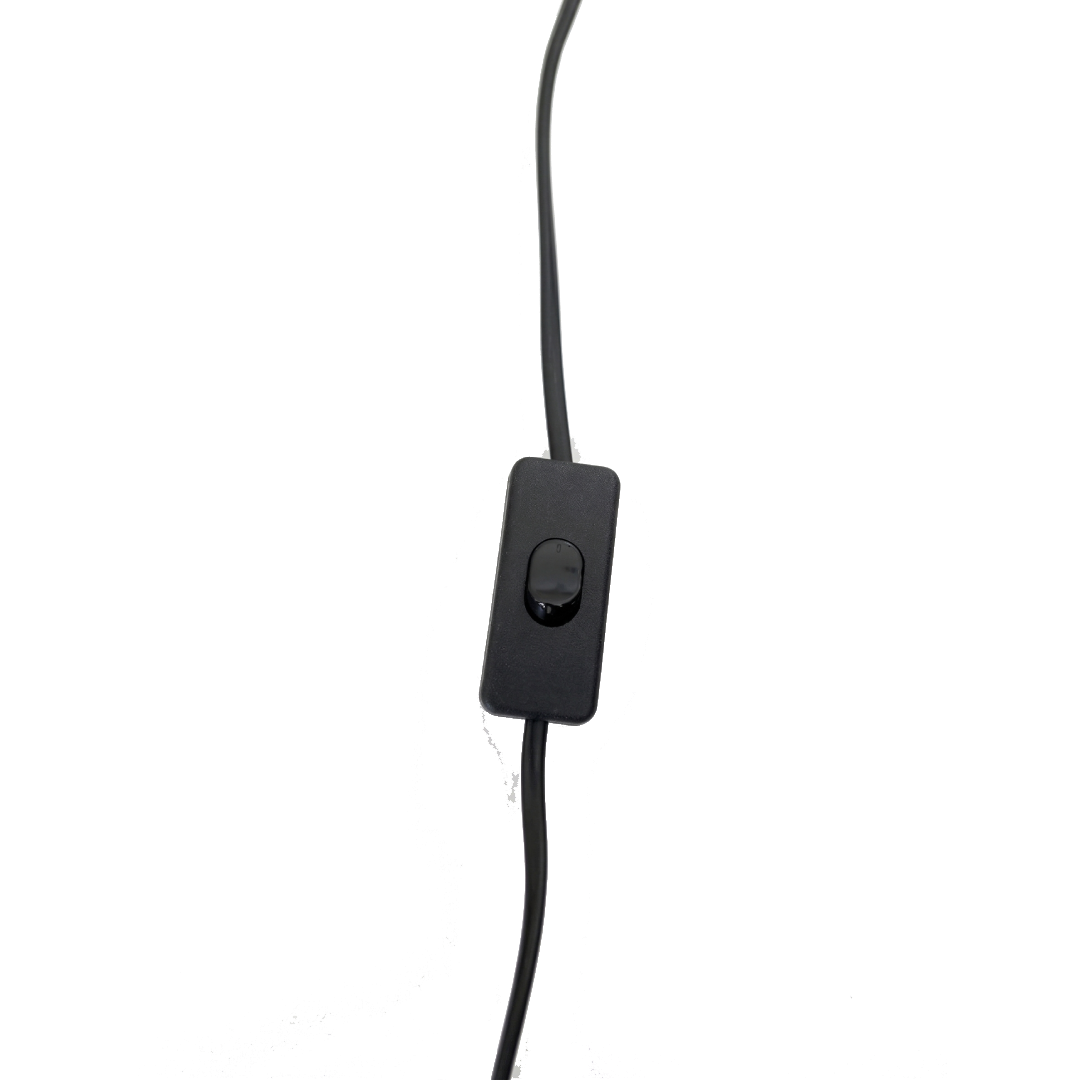
Plug in the cable to the wall and connected to the cable close to the plug there is a switch to give power to the light. The little indent on one side of the switch should be flipped on in order for the light to work.


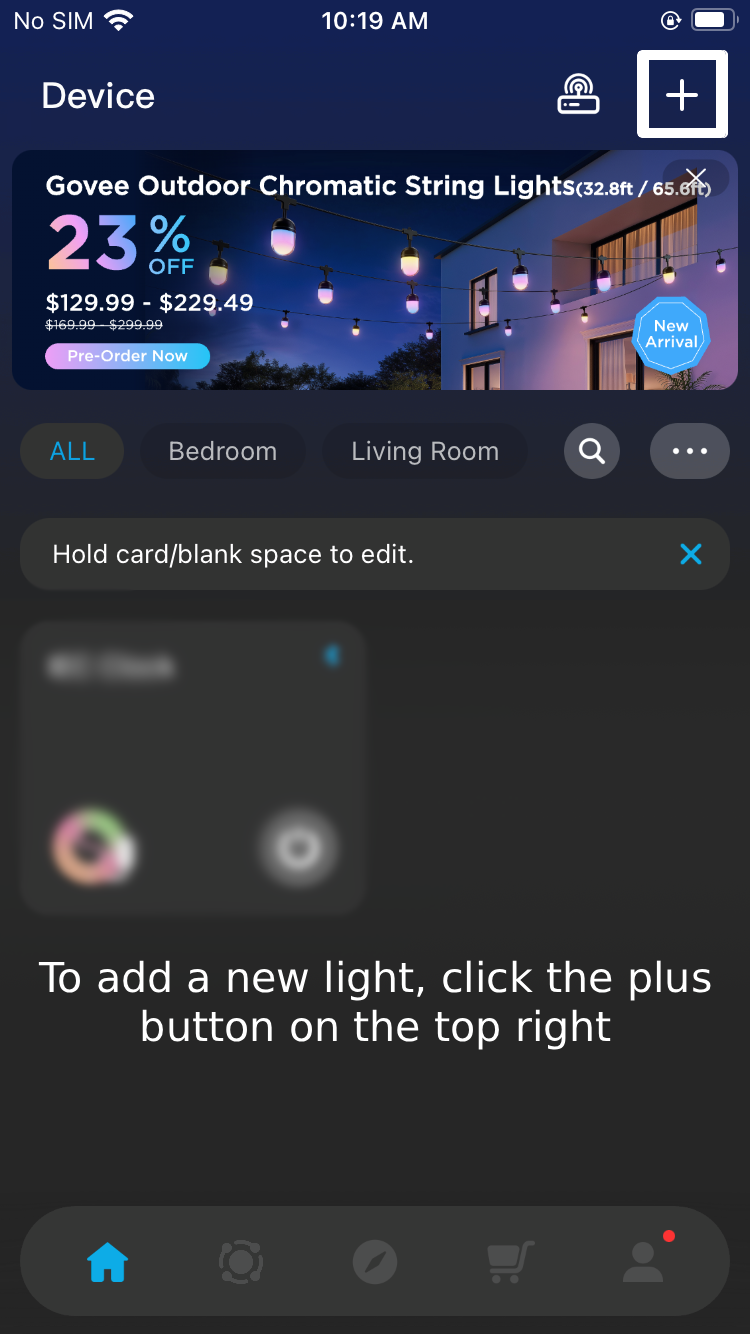
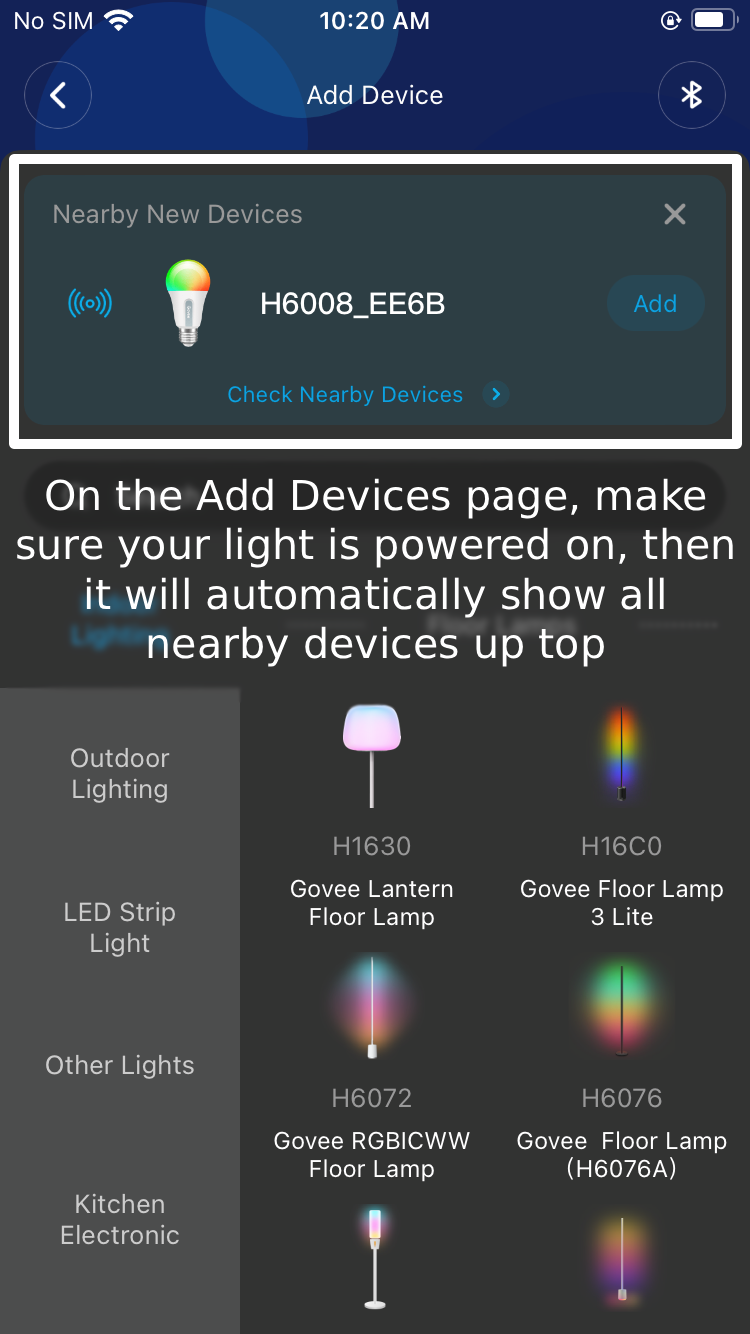
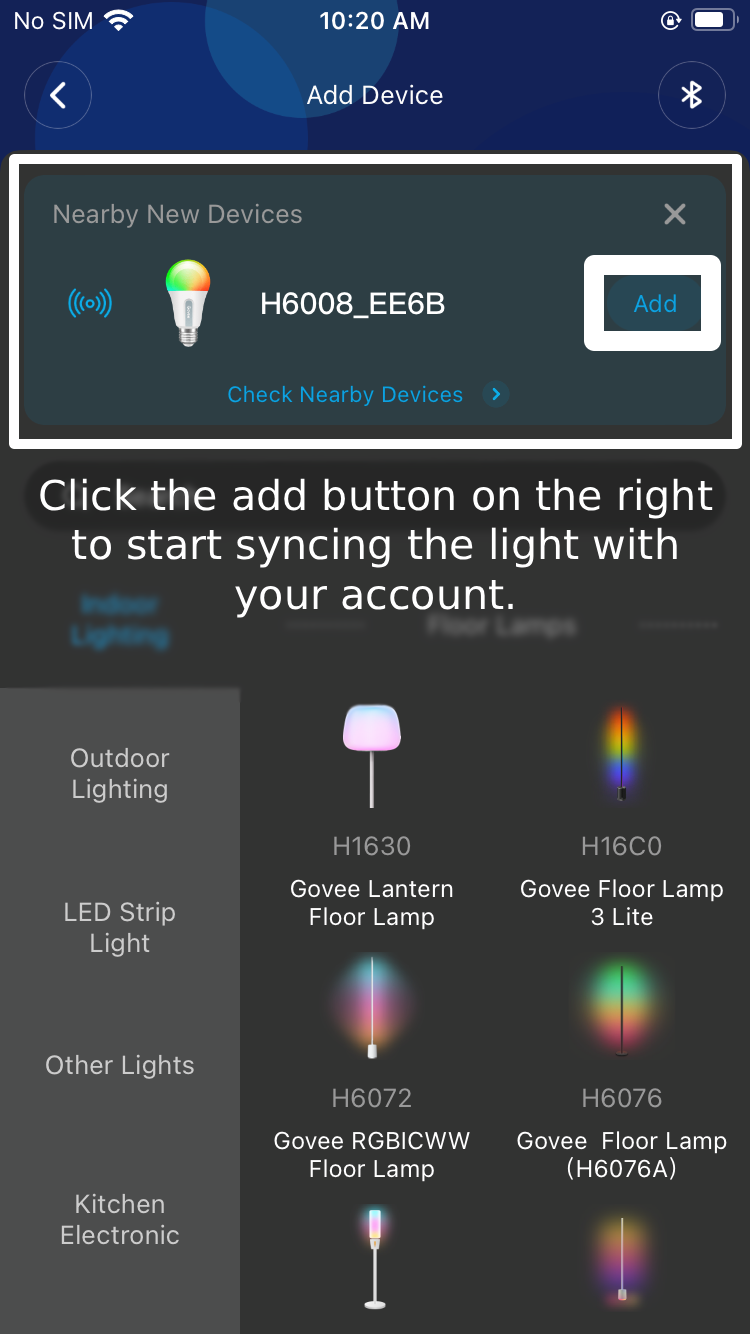
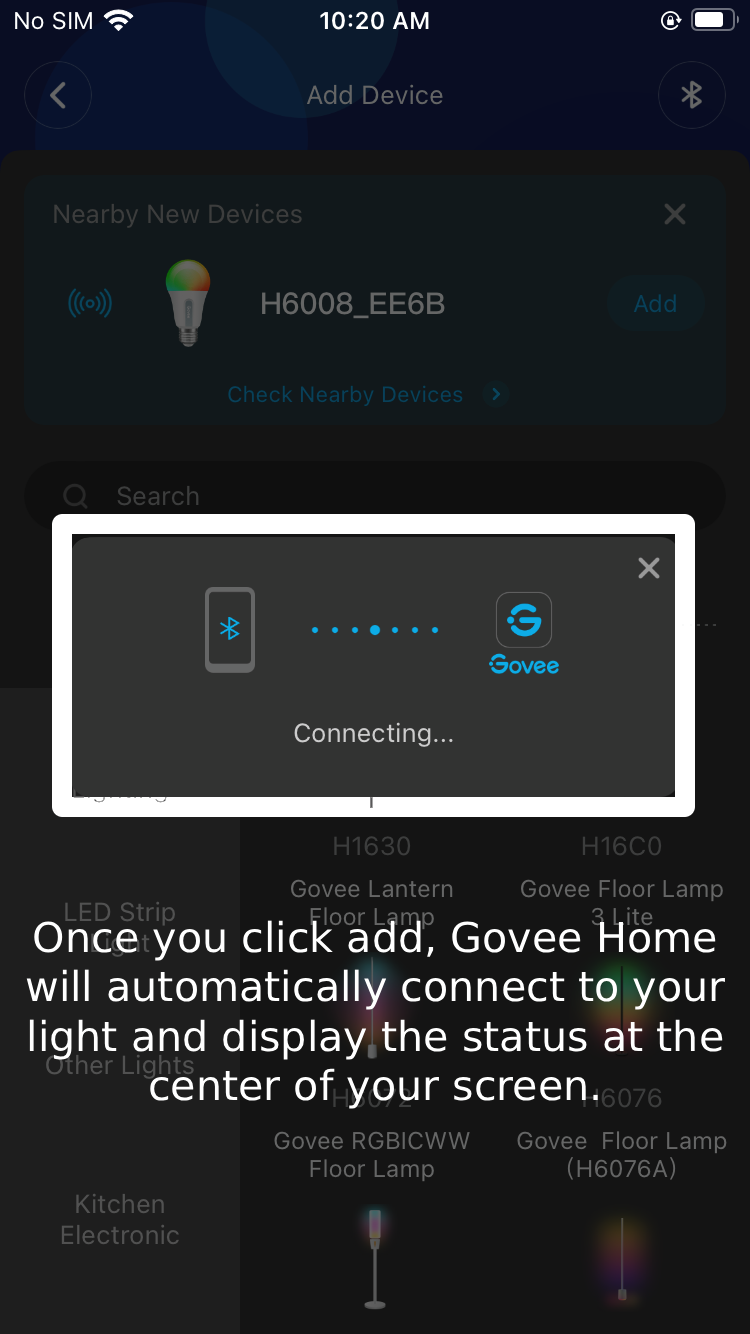
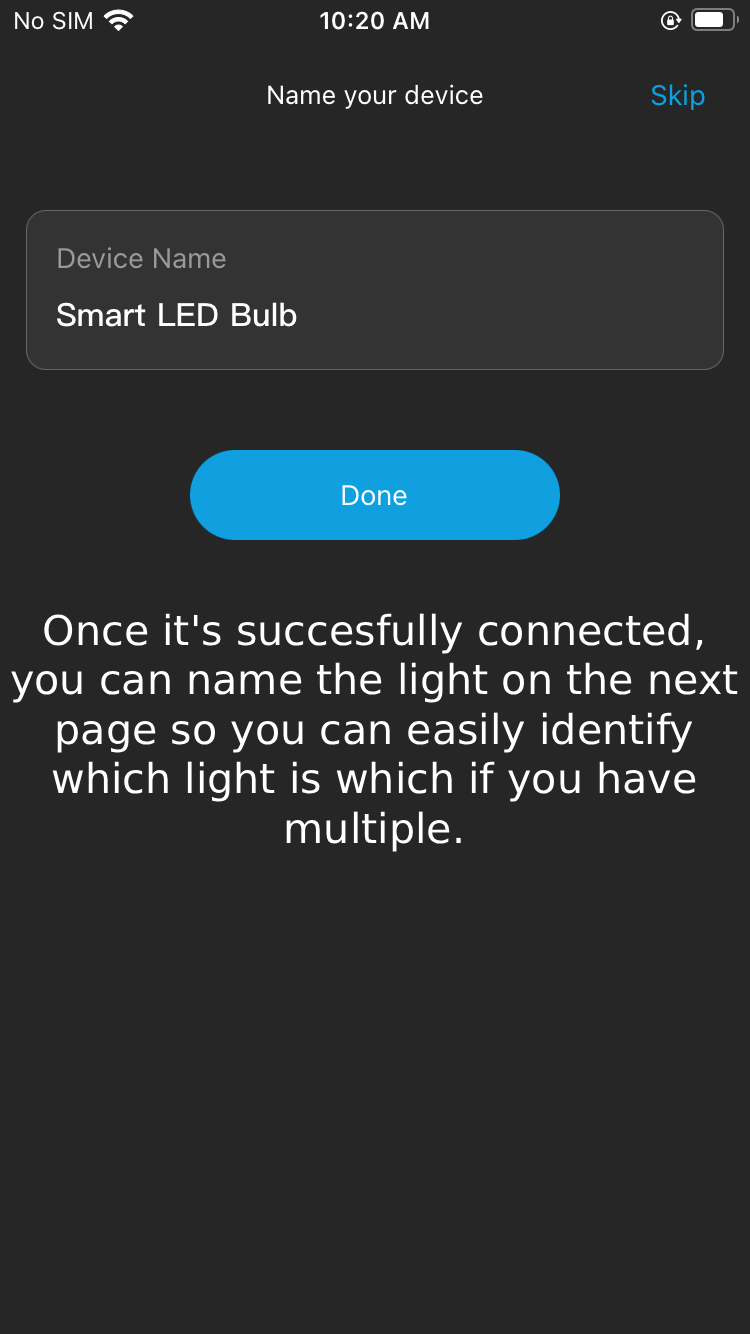
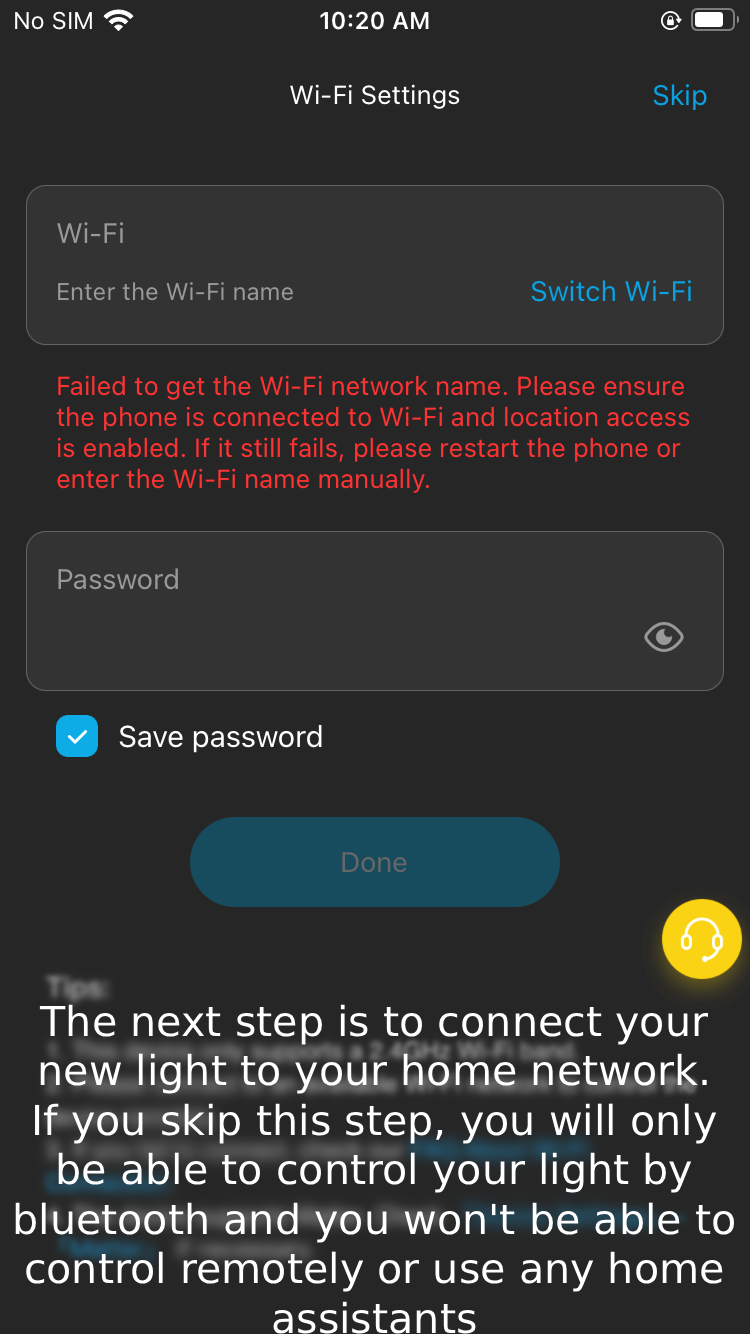
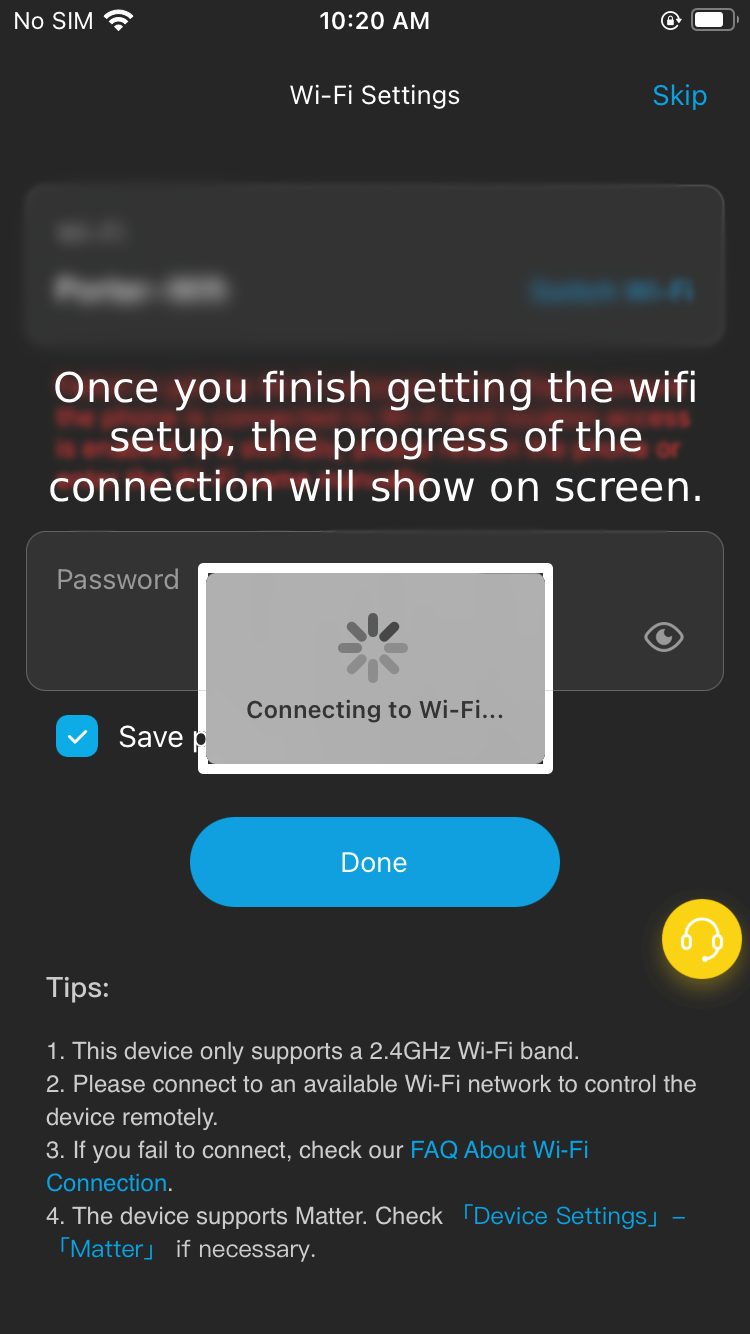
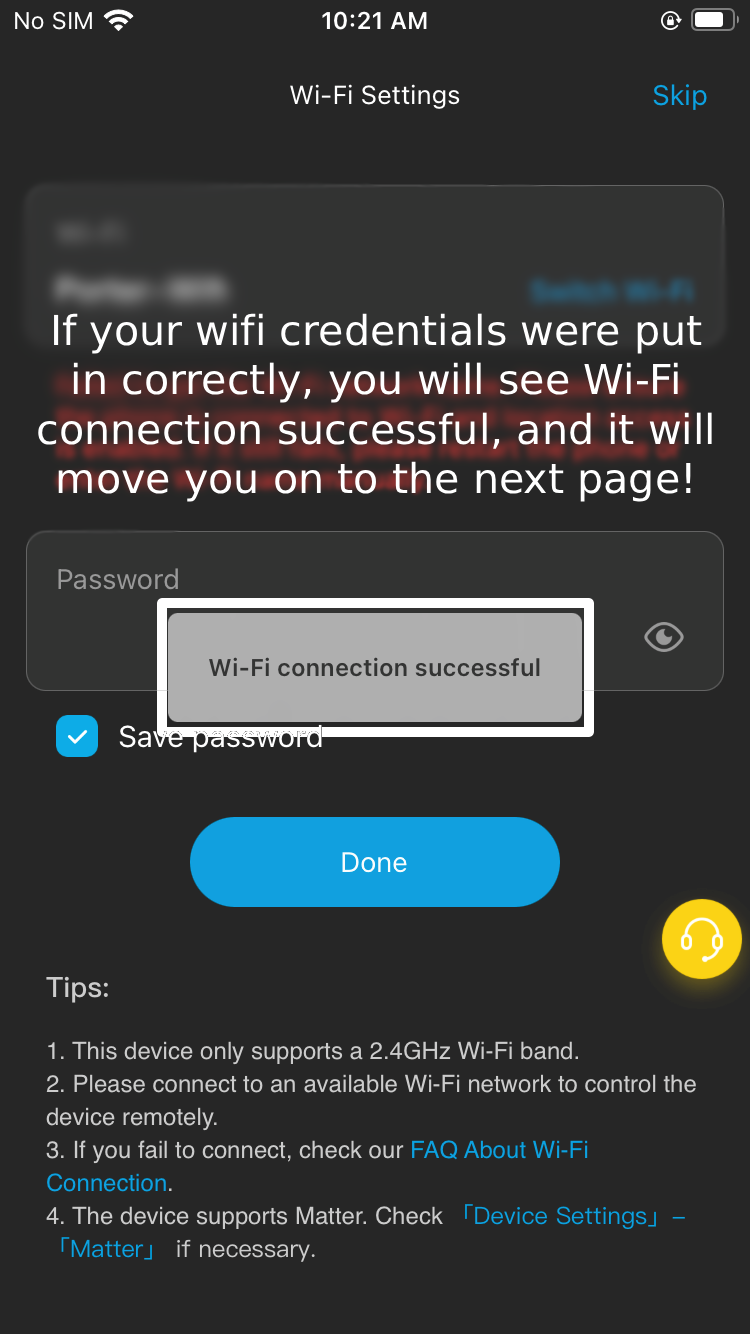
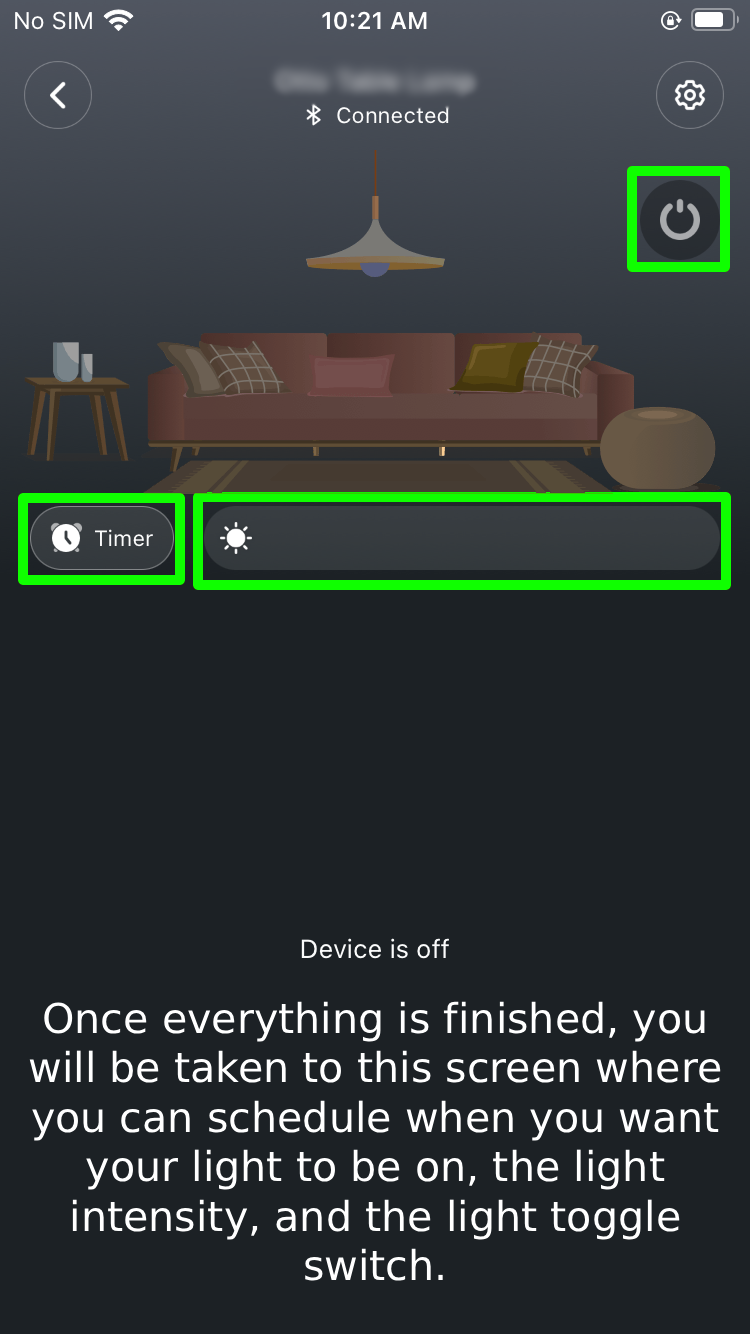
5: Download Govee Home App On Phone

A black and white clipboard with a checklist and a pencil.

To get the max functionality on your lamp, download the Govee Home app by scanning the QR code above to unlock features like remote control and accessing the lamp from anywhere in the world! Read below for instructions on how to setup your lamp on the app.


6: Don’t Let It Get Hot!

Red thermometer icon indicating a high temperature level.

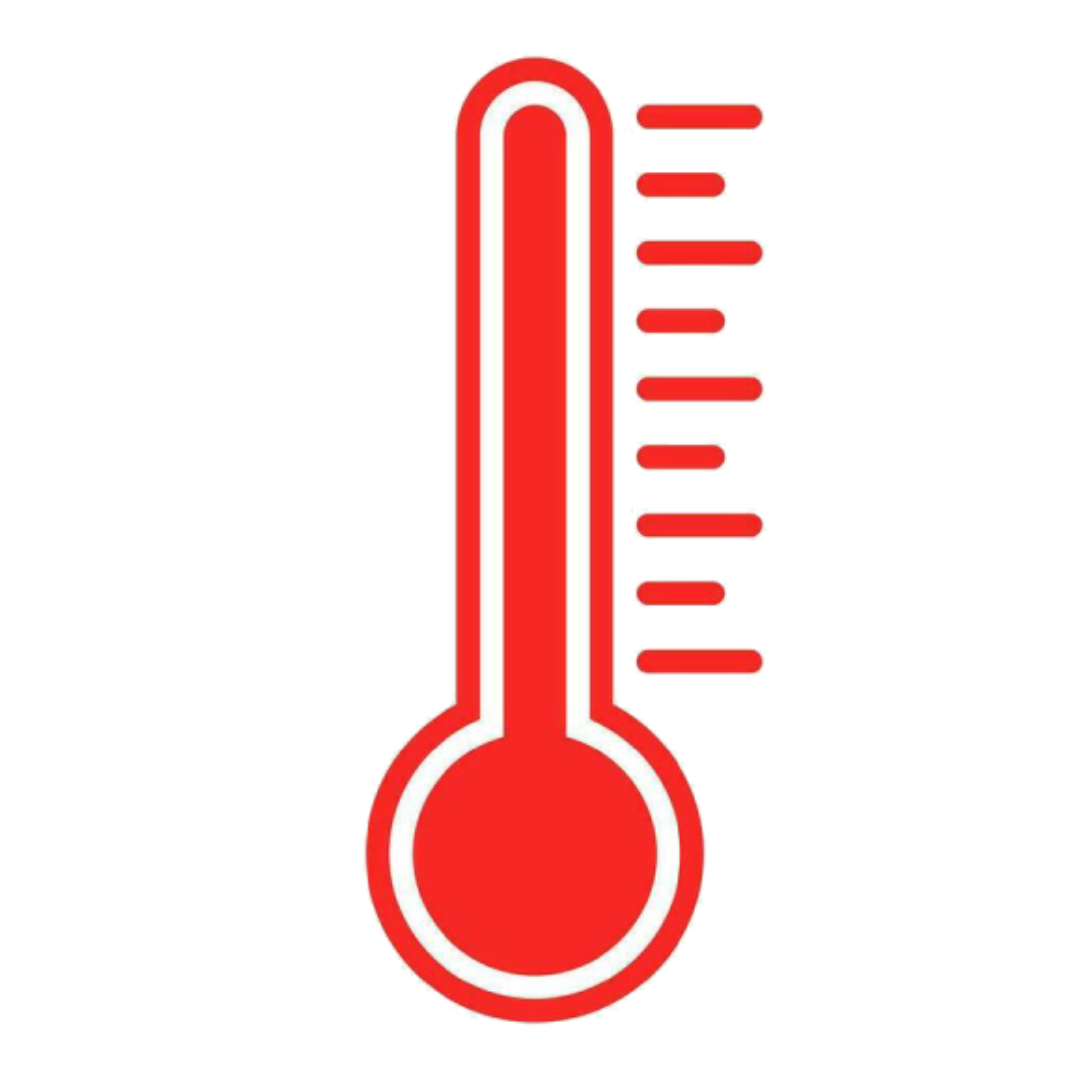
Don’t let it get in temperatures over 100°F or you could risk it getting too hot and warping! Keep it at room temperature and avoid direct faucet contact.


Govee Home Instructions

Mobile app screen showing smart light controls, with a promotional banner for outdoor chromatic string lights and a section for adding new lights.

3.

A smartphone screen showing the process of adding a nearby smart light device, with icons of different smart lights and a section explaining how to check for nearby devices.

4.

Mobile app screen showing nearby smart lights with options to add and sync devices, including Govee lantern, floor lamps, LED strip, and kitchen lights.

5.

Screenshot of a mobile app screen showing a Bluetooth device connecting to Govee Home, with instructions to click add for automatic connection of smart lights.

6.

Mobile app screen showing device naming interface for a smart LED bulb, with a blue 'Done' button and instructions about labeling lights for easy identification.

7.

Screenshot of a mobile device's Wi-Fi setup screen with an error message in red, indicating failure to get the Wi-Fi network name, and a text explanation about connecting a smart light to a home network.

8.

iPhone screen displaying Wi-Fi settings with a 'Connecting to Wi-Fi...' message and a progress indicator. Instructions on how to complete Wi-Fi setup are visible.

9.

A smartphone screen displaying Wi-Fi settings with a pop-up message that reads 'Wi-Fi connection successful'. The screen shows instructions for connecting to Wi-Fi, a password field, an option to save the password, and a 'Done' button.

10.

Smart home lighting app interface on a mobile screen, showing options to set a timer and adjust brightness with a power button at the top right corner.

11.

11.

Screenshot of smart lighting app interface with a living room scene, showing a lamp hanging from the ceiling, furniture, and a message about adjusting light settings. The app has options for color, scene, illumination, music, share space, DIY, and more, with a yellow bar indicating 100% brightness.

12.

Mobile app screen displaying outdoor string lights with a promotional banner, account creation instructions, and a blurred control panel, with navigation icons at the bottom.

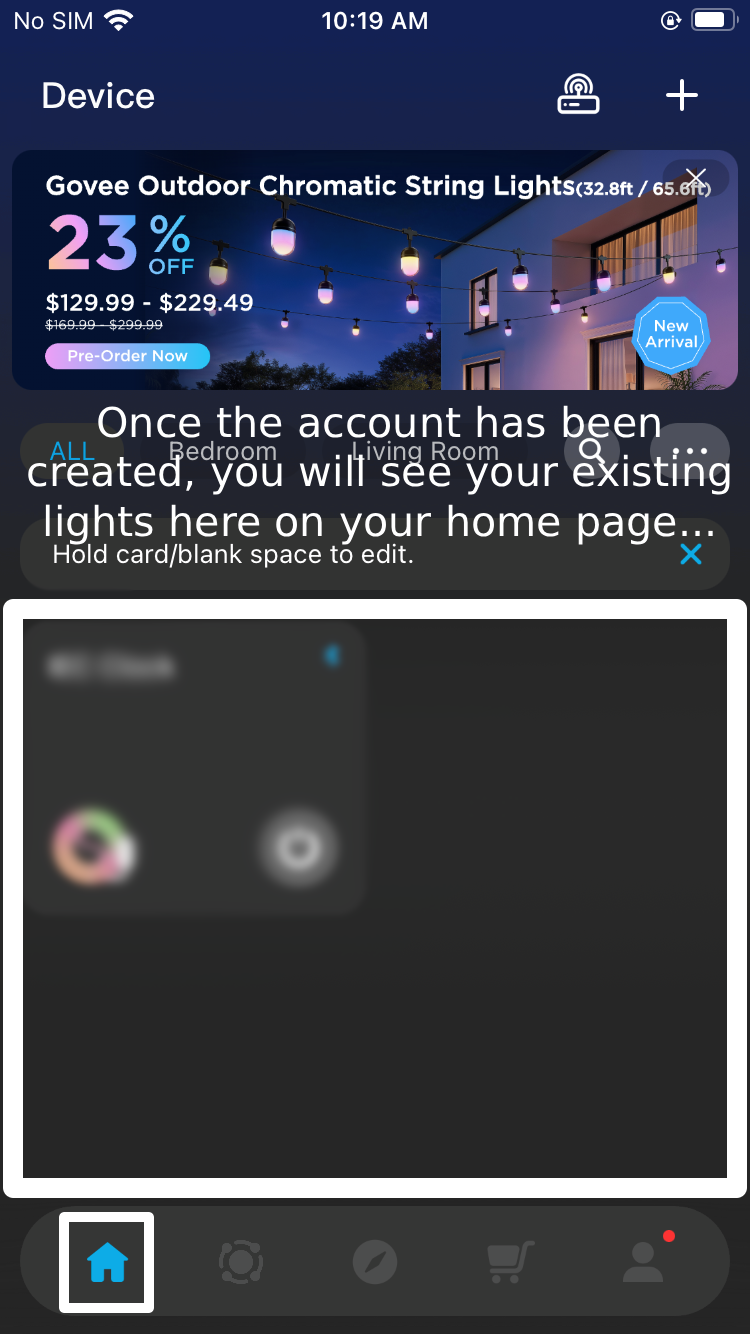
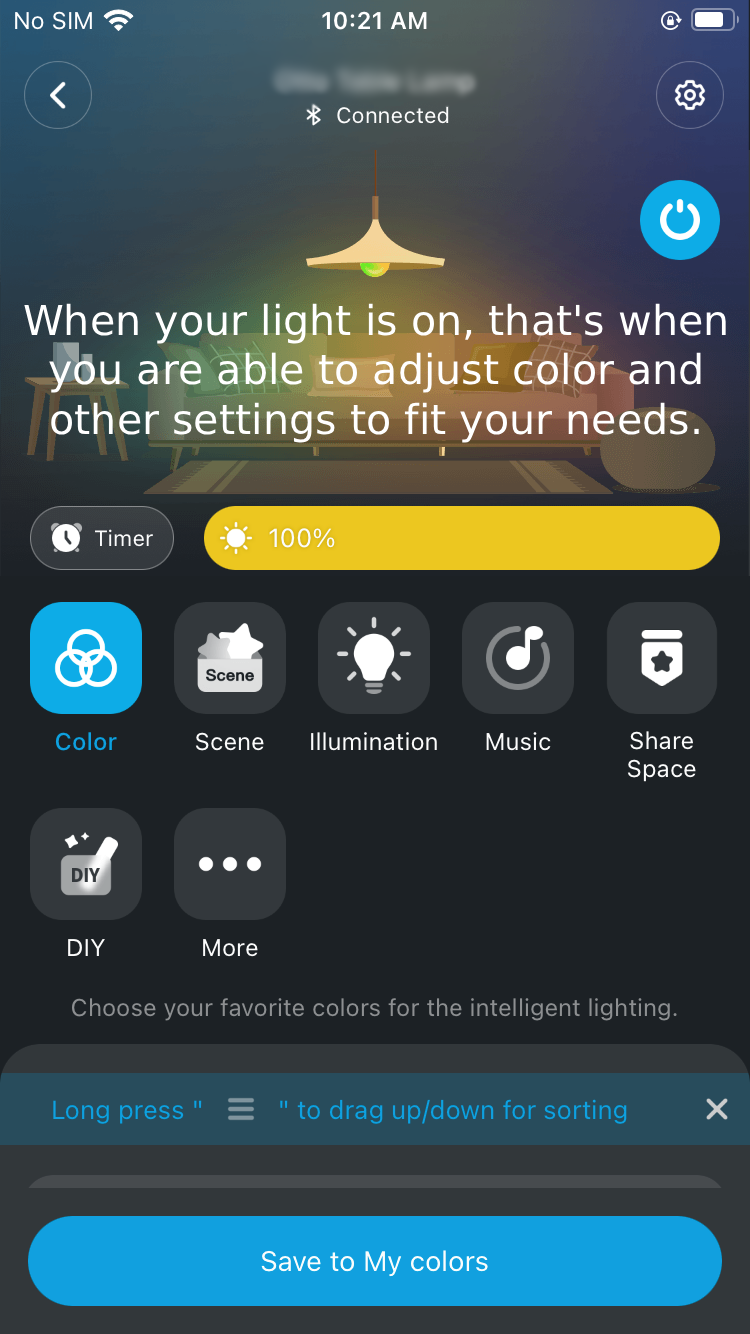
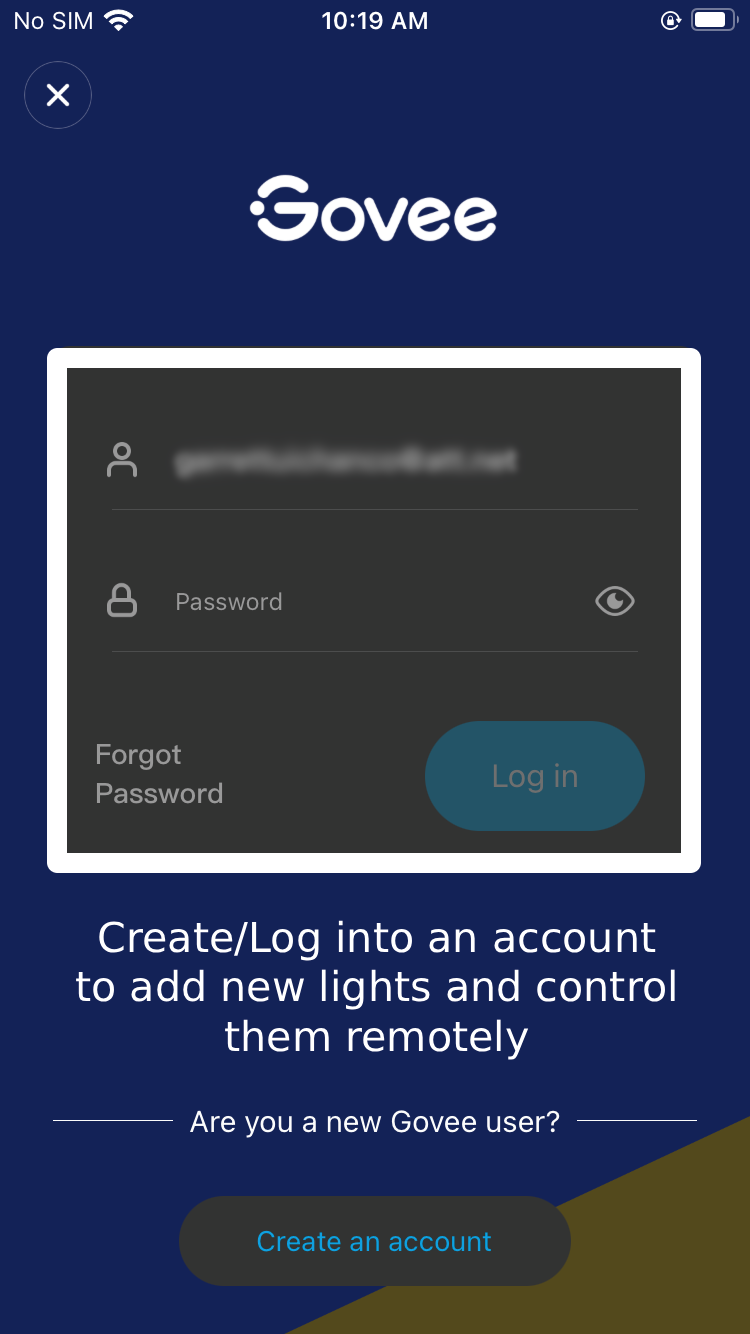
Once you have the Govee Home app installed on your phone, open the app and reference the images below to help you setup your light for remote control and Smart Home Assistant setup!

Screenshot of the Govee app login screen, showing fields for email and password, a 'Create an account' button, and a logo at the top.

1.

2.

A mobile app interface for adjusting smart light colors and temperature, showing a slider for color temperature, basic color options, and a color wheel.

13.


About your 3D Printed Soap Dish

At Firecloud Printz LLC, we use high-quality PLA (Polylactic Acid) for the soap dish. PLA is a favorite in the 3D printing world because it allows us to capture incredible detail and vibrant colors while staying environmentally conscious.

Why We Use PLA

  • Eco-Friendly: PLA is a bioplastic derived from renewable resources like corn starch. It’s a more sustainable choice compared to traditional petroleum-based plastics.

  • Stunning Detail: This material allows for sharp lines and a smooth finish, ensuring your item looks exactly as intended.

  • Safe for the Home: PLA is non-toxic and produces no harsh chemical odors, making it perfect for indoor display and use.

Care Instructions & Tips

To keep your 3D print looking its best, please keep the following in mind:

  • Keep It Cool: PLA has a low melting point. Please avoid leaving your print in high-heat environments, such as a parked car on a hot day or near a direct heat source, as it may soften or warp.

  • Indoor Use Recommended: While durable, PLA can become brittle if left in direct sunlight (UV rays) or outdoor elements for extended periods.

  • Strength & Handling: PLA is very rigid and strong, but it can be brittle if dropped on hard surfaces or subjected to heavy impacts. Treat your print with care!


Thank you again for choosing Firecloud Printz for all of your 3D printing needs! We look forward to your next 3D printing needs!