
3D Printing Designs: What Makes a Model Easy to Print
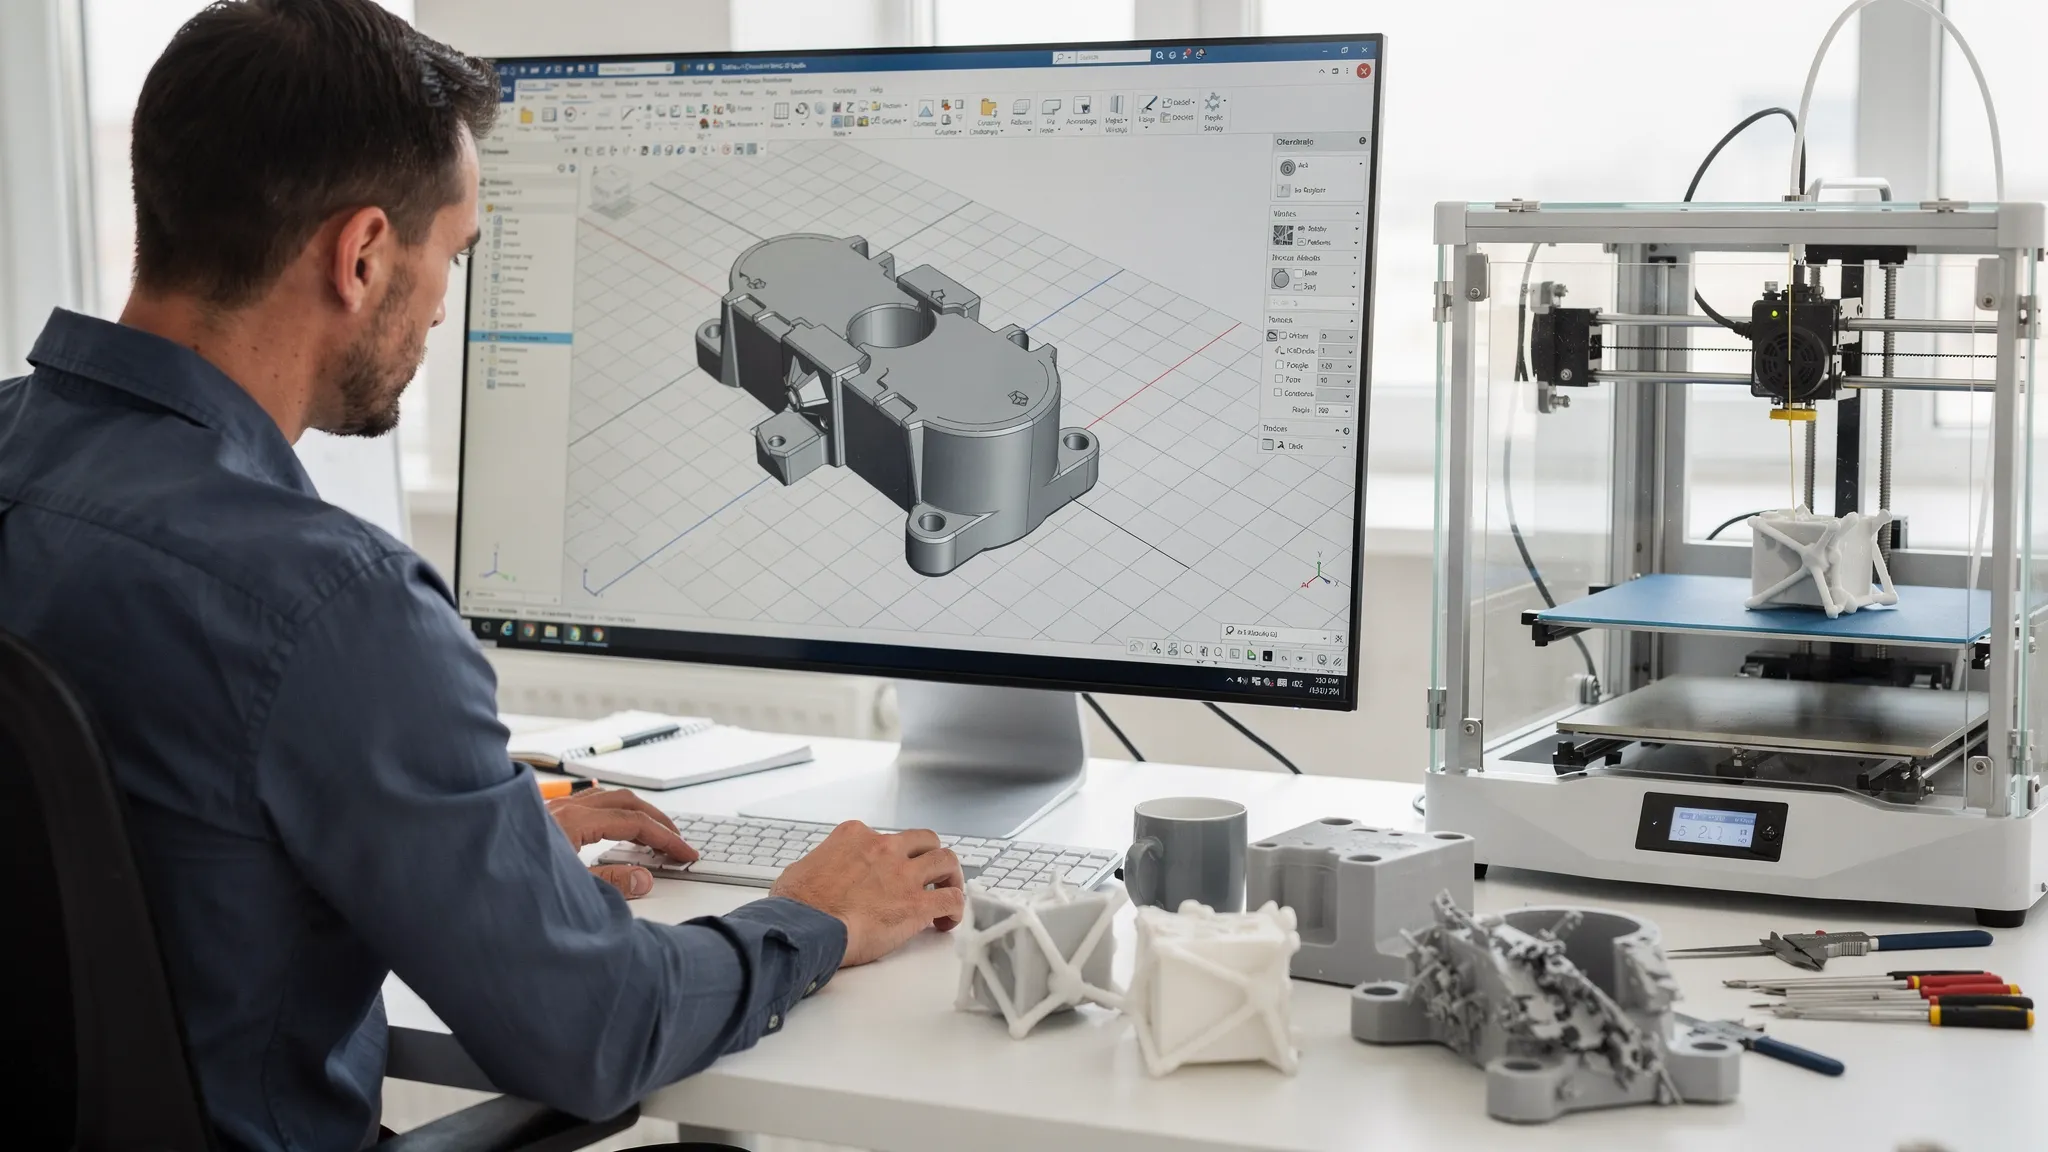
“Easy to print” is not the same as “simple.” Some highly detailed miniatures print reliably, while a plain-looking bracket can fail repeatedly. The difference usually comes down to whether the design works with how 3D printers build parts, layer by layer, rather than fighting gravity, heat, and toolpath limits.
If you create or sell 3D printing designs, understanding print-friendly modeling rules helps you reduce supports, prevent warping, improve fit, and get more predictable quotes and turnaround times from a printing service.
What “easy to print” really means
A model is generally easy to print when it:
- Slices cleanly without errors or weird gaps
- Needs minimal supports (or supports in non-critical areas)
- Has features sized for the printer’s resolution (no ultra-thin “knife edges”)
- Tolerates small variations (shrinkage, elephant’s foot, layer lines)
- Can be oriented in more than one workable way
In other words, it is designed for repeatability, not just visual correctness in CAD.
Design choices that reduce supports (and cleanup)
Supports add material, time, and risk. They can also scar visible surfaces. A “support-light” design is one of the biggest predictors of print success.
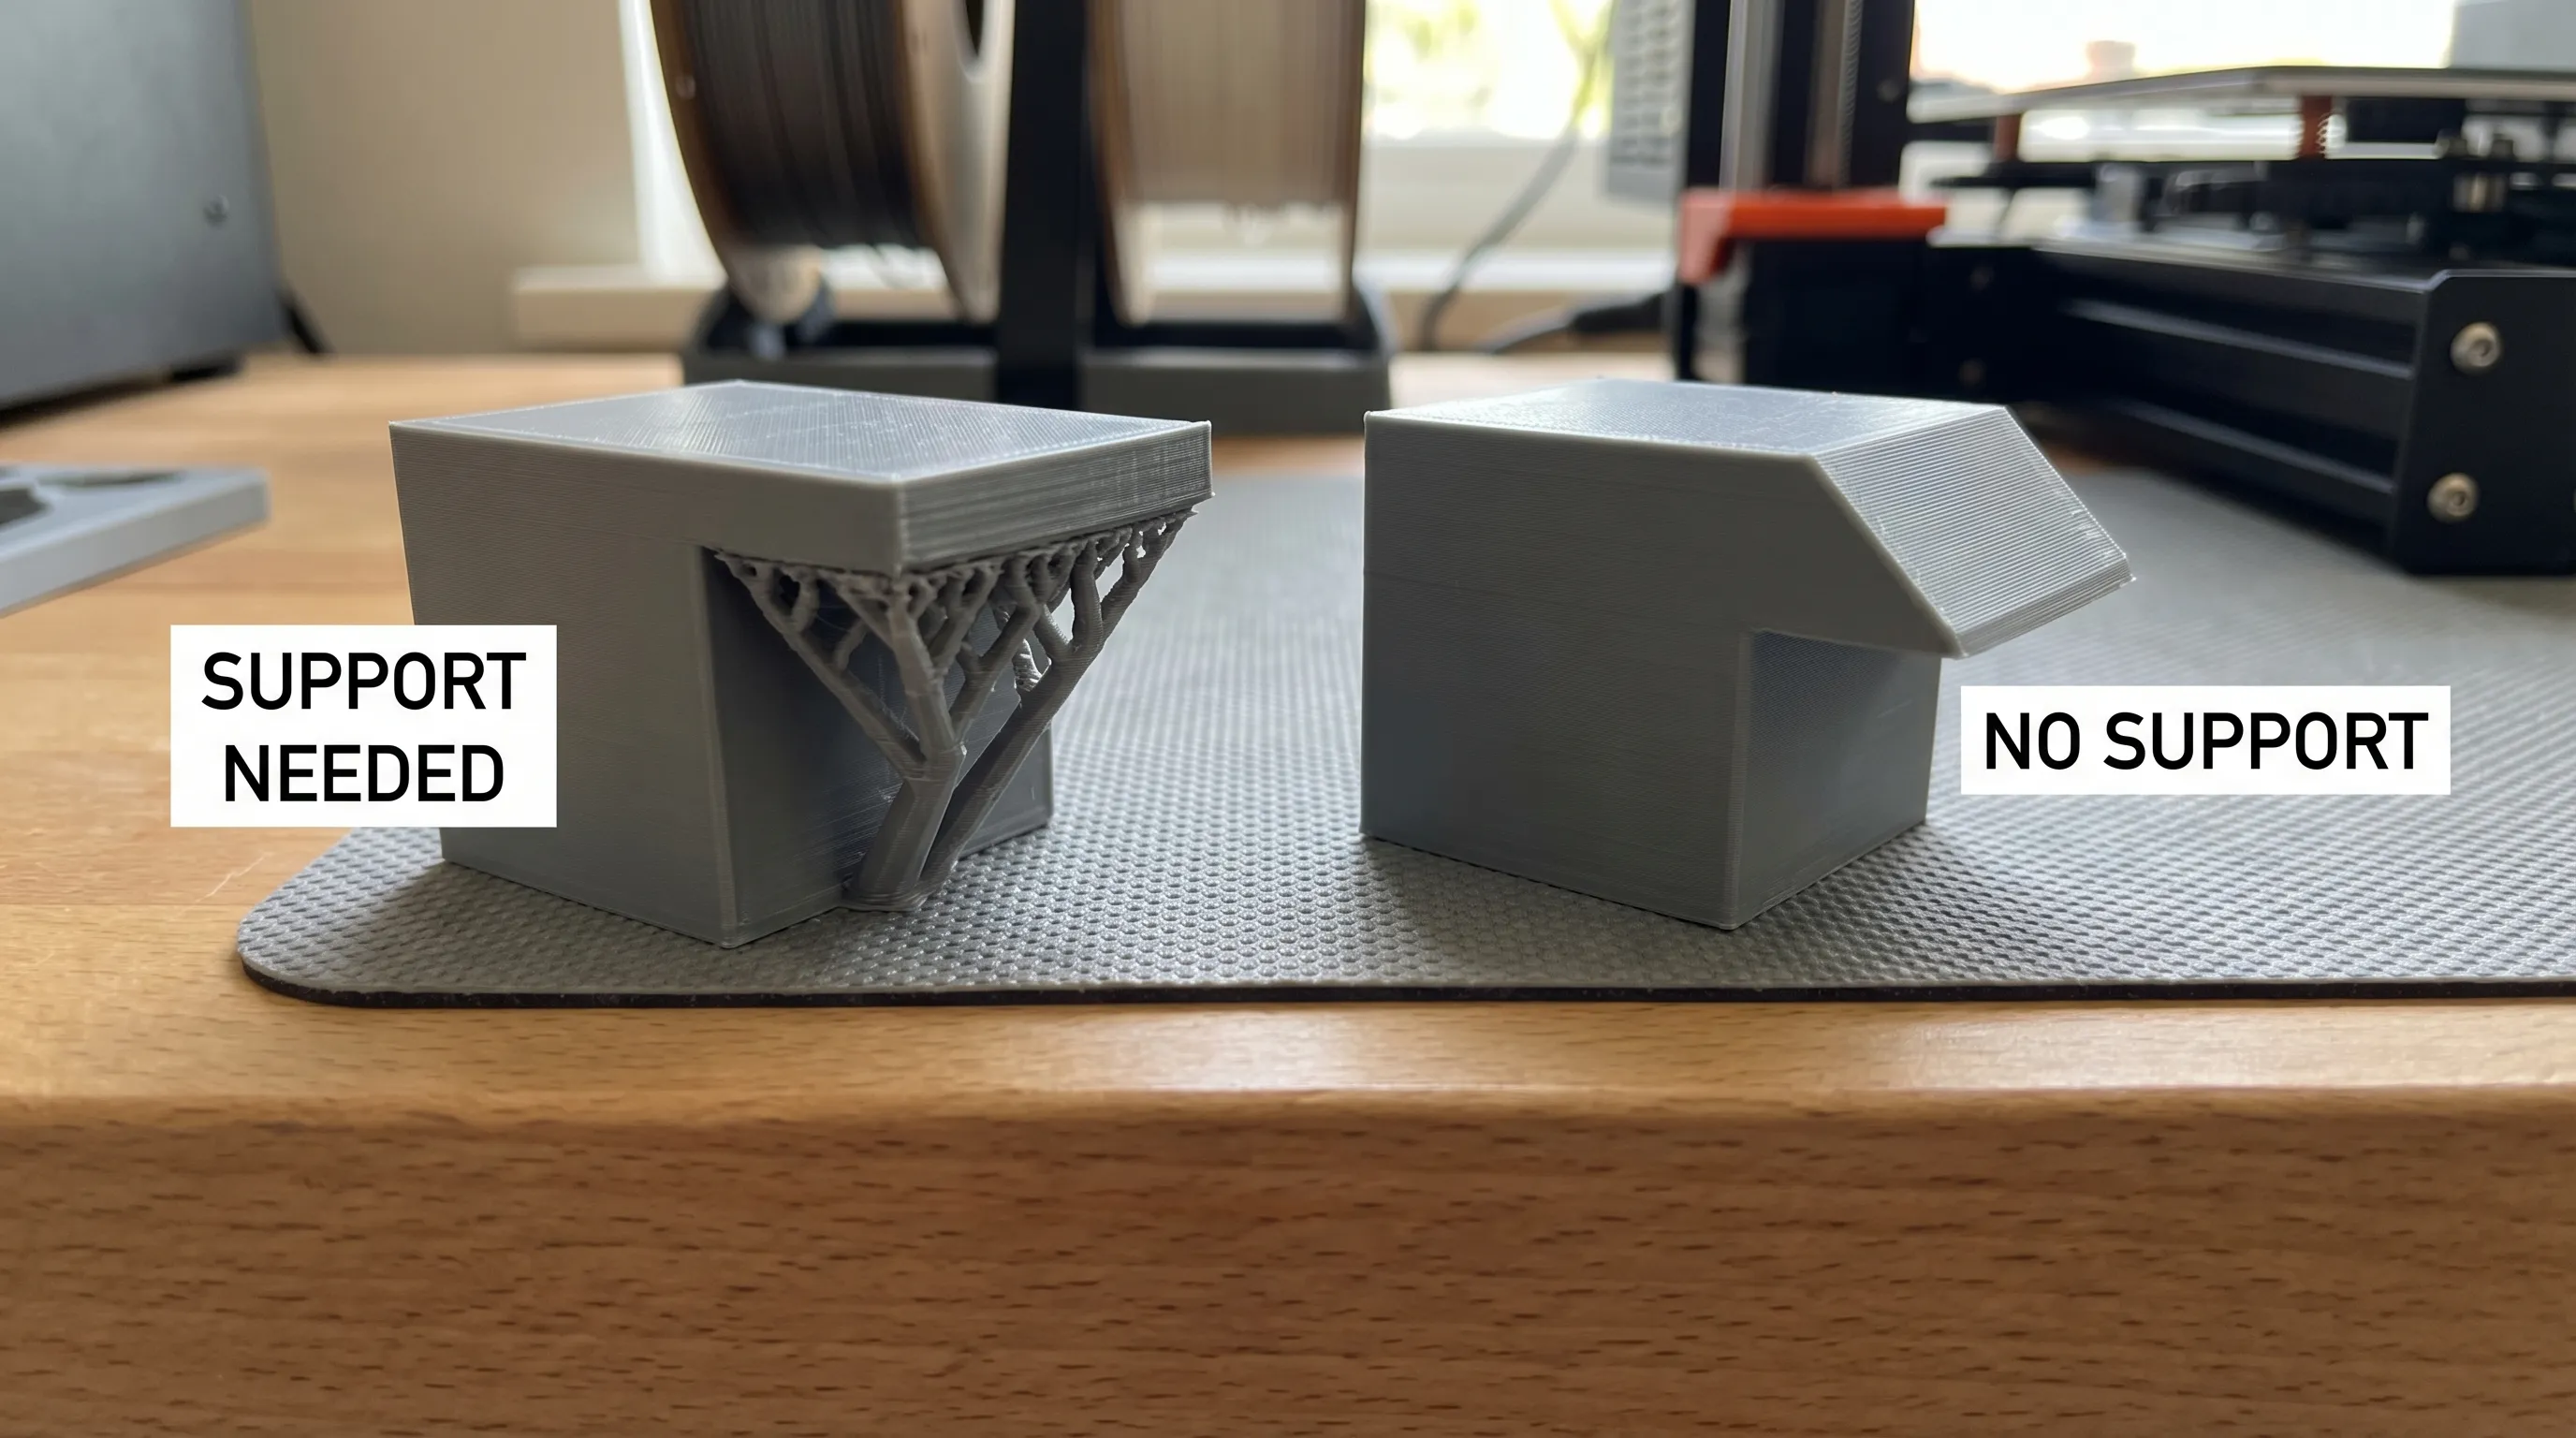
Favor self-supporting angles
Most processes dislike near-horizontal overhangs. A reliable trick is to replace 90 degree “shelves” with chamfers or gentle slopes.
For example:
- Swap a square cutout roof for a 45 degree chamfered roof
- Replace a sharp T-junction with a filleted transition
- Add a teardrop profile for holes that would otherwise need support
General rule: the more your surfaces gradually step outward, the easier the print.
Put “ugly surfaces” where you can hide them
When supports are unavoidable, design so their touch points land on:
- Internal faces
- Bottom faces that sit on a table
- Areas that will be sanded, glued, or painted anyway
If you are designing a product meant to be displayed, treat support placement like you would treat seam placement in injection molding: plan it early.
Break the model into printable modules
Large or awkward shapes often become easy to print once split into logical parts. Splitting can:
- Eliminate supports by re-orienting each piece
- Reduce failure risk (one small part failing is cheaper than one huge part failing)
- Improve surface finish on show faces
Design splits intentionally: add alignment pins, tongues and grooves, or flat registration faces. If you plan to glue, give yourself sufficient bonding area instead of tiny contact points.
Geometry that prints reliably (even at different scales)
Use consistent, realistic wall thickness
Wall thickness is a common failure point because it affects strength, print time, and whether slicers generate clean toolpaths.
Print-friendly walls are usually:
- Thick enough to be made of multiple extrusion lines (FDM) or multiple pixel exposures (resin)
- Not so thin that they turn into a single fragile shell
- Not so thick that they trap heat and cause warping on large flat areas
If your design includes thin “skins” for aesthetics, consider adding subtle internal ribs to stiffen them without making the whole part bulky.
Avoid tall, skinny “whip” features
Thin antennas, spikes, and long narrow posts often fail because they:
- Vibrate during printing
- Cool too fast (poor layer bonding)
- Get knocked by the nozzle (FDM) or peel forces (resin)
Solutions that keep the look while improving printability:
- Thicken the base and taper the tip
- Add a small fillet or gusset where the feature meets the body
- Print the feature as a separate part and assemble it
Add fillets and chamfers where stress concentrates
Sharp internal corners are both weak and hard to print cleanly. Fillets and chamfers:
- Reduce cracking in functional parts
- Improve top-surface quality around edges
- Make supports less necessary in some transitions
If you are modeling a functional bracket, a small fillet can be the difference between a part that survives light use and one that snaps at the layer lines.
Orientation-friendly designs (less trial and error)
A model becomes much easier to print when it offers multiple “good” orientations.
Give the part a stable base
Designs with a wide, flat contact area tend to adhere better and warp less. If your part must be rounded, consider adding a sacrificial flat (a removable “print foot”) or a discrete base ring you can sand off.
Avoid tiny first-layer footprints
Small contact points can detach mid-print. If the model naturally touches the bed at small points (like feet, claws, or tips), consider:
- Connecting the points with a thin removable raft-like bar
- Adding a base plate (especially for display models)
- Thickening contact points subtly
Plan around anisotropic strength (layer-direction weakness)
3D printed parts are often weaker across layer bonds than within a layer. A print-friendly design either:
- Can be oriented so major loads run along continuous lines, or
- Includes geometry that reduces stress at layer boundaries (fillets, ribs, thicker sections)
For a customer ordering a functional part, this matters as much as aesthetics.
Clearances, fit, and “why doesn’t it snap together?”
Assemblies are where beautiful designs become frustrating prints. Real printers have tolerance stacks: extrusion width, resin shrinkage, temperature effects, and post-processing all change final dimensions.
Start with clearance targets, then test
Use these as starting points for slip fits and moving parts, then adjust for your printer/process/material:
| Use case | FDM starting clearance (typical) | Resin starting clearance (typical) | Notes |
|---|---|---|---|
| Easy slip fit (parts should slide) | ~0.3 to 0.5 mm | ~0.15 to 0.3 mm | Add more if surfaces are rough or post-cured |
| Snug fit (light press fit) | ~0.1 to 0.2 mm | ~0.05 to 0.15 mm | Risk of binding increases fast |
| Print-in-place hinges/joints | ~0.4 to 0.6 mm | ~0.2 to 0.4 mm | Keep contact areas small and rounded |
These ranges are widely used in practice, but every workflow differs. The most reliable approach is to include a small tolerance test strip in the same order as your first prototype.
Design holes and slots with printing reality in mind
Holes often print undersized, especially in FDM, because perimeters approximate circles and molten plastic pulls inward slightly. Helpful design tweaks:
- Use teardrop or diamond-shaped holes when a perfect circle is not required
- Add a small chamfer at hole entrances to reduce elephant’s foot interference
- If the hole must be precise, design for drilling or reaming after printing
For deeper guidance on preparing models to avoid common print failures, you can also reference Firecloud Printz’s guide on how to choose a 3D model for 3D printer success.
Detail level vs printer capability (keep fine details printable)
A model can look correct on screen but contain details below what the process can resolve.
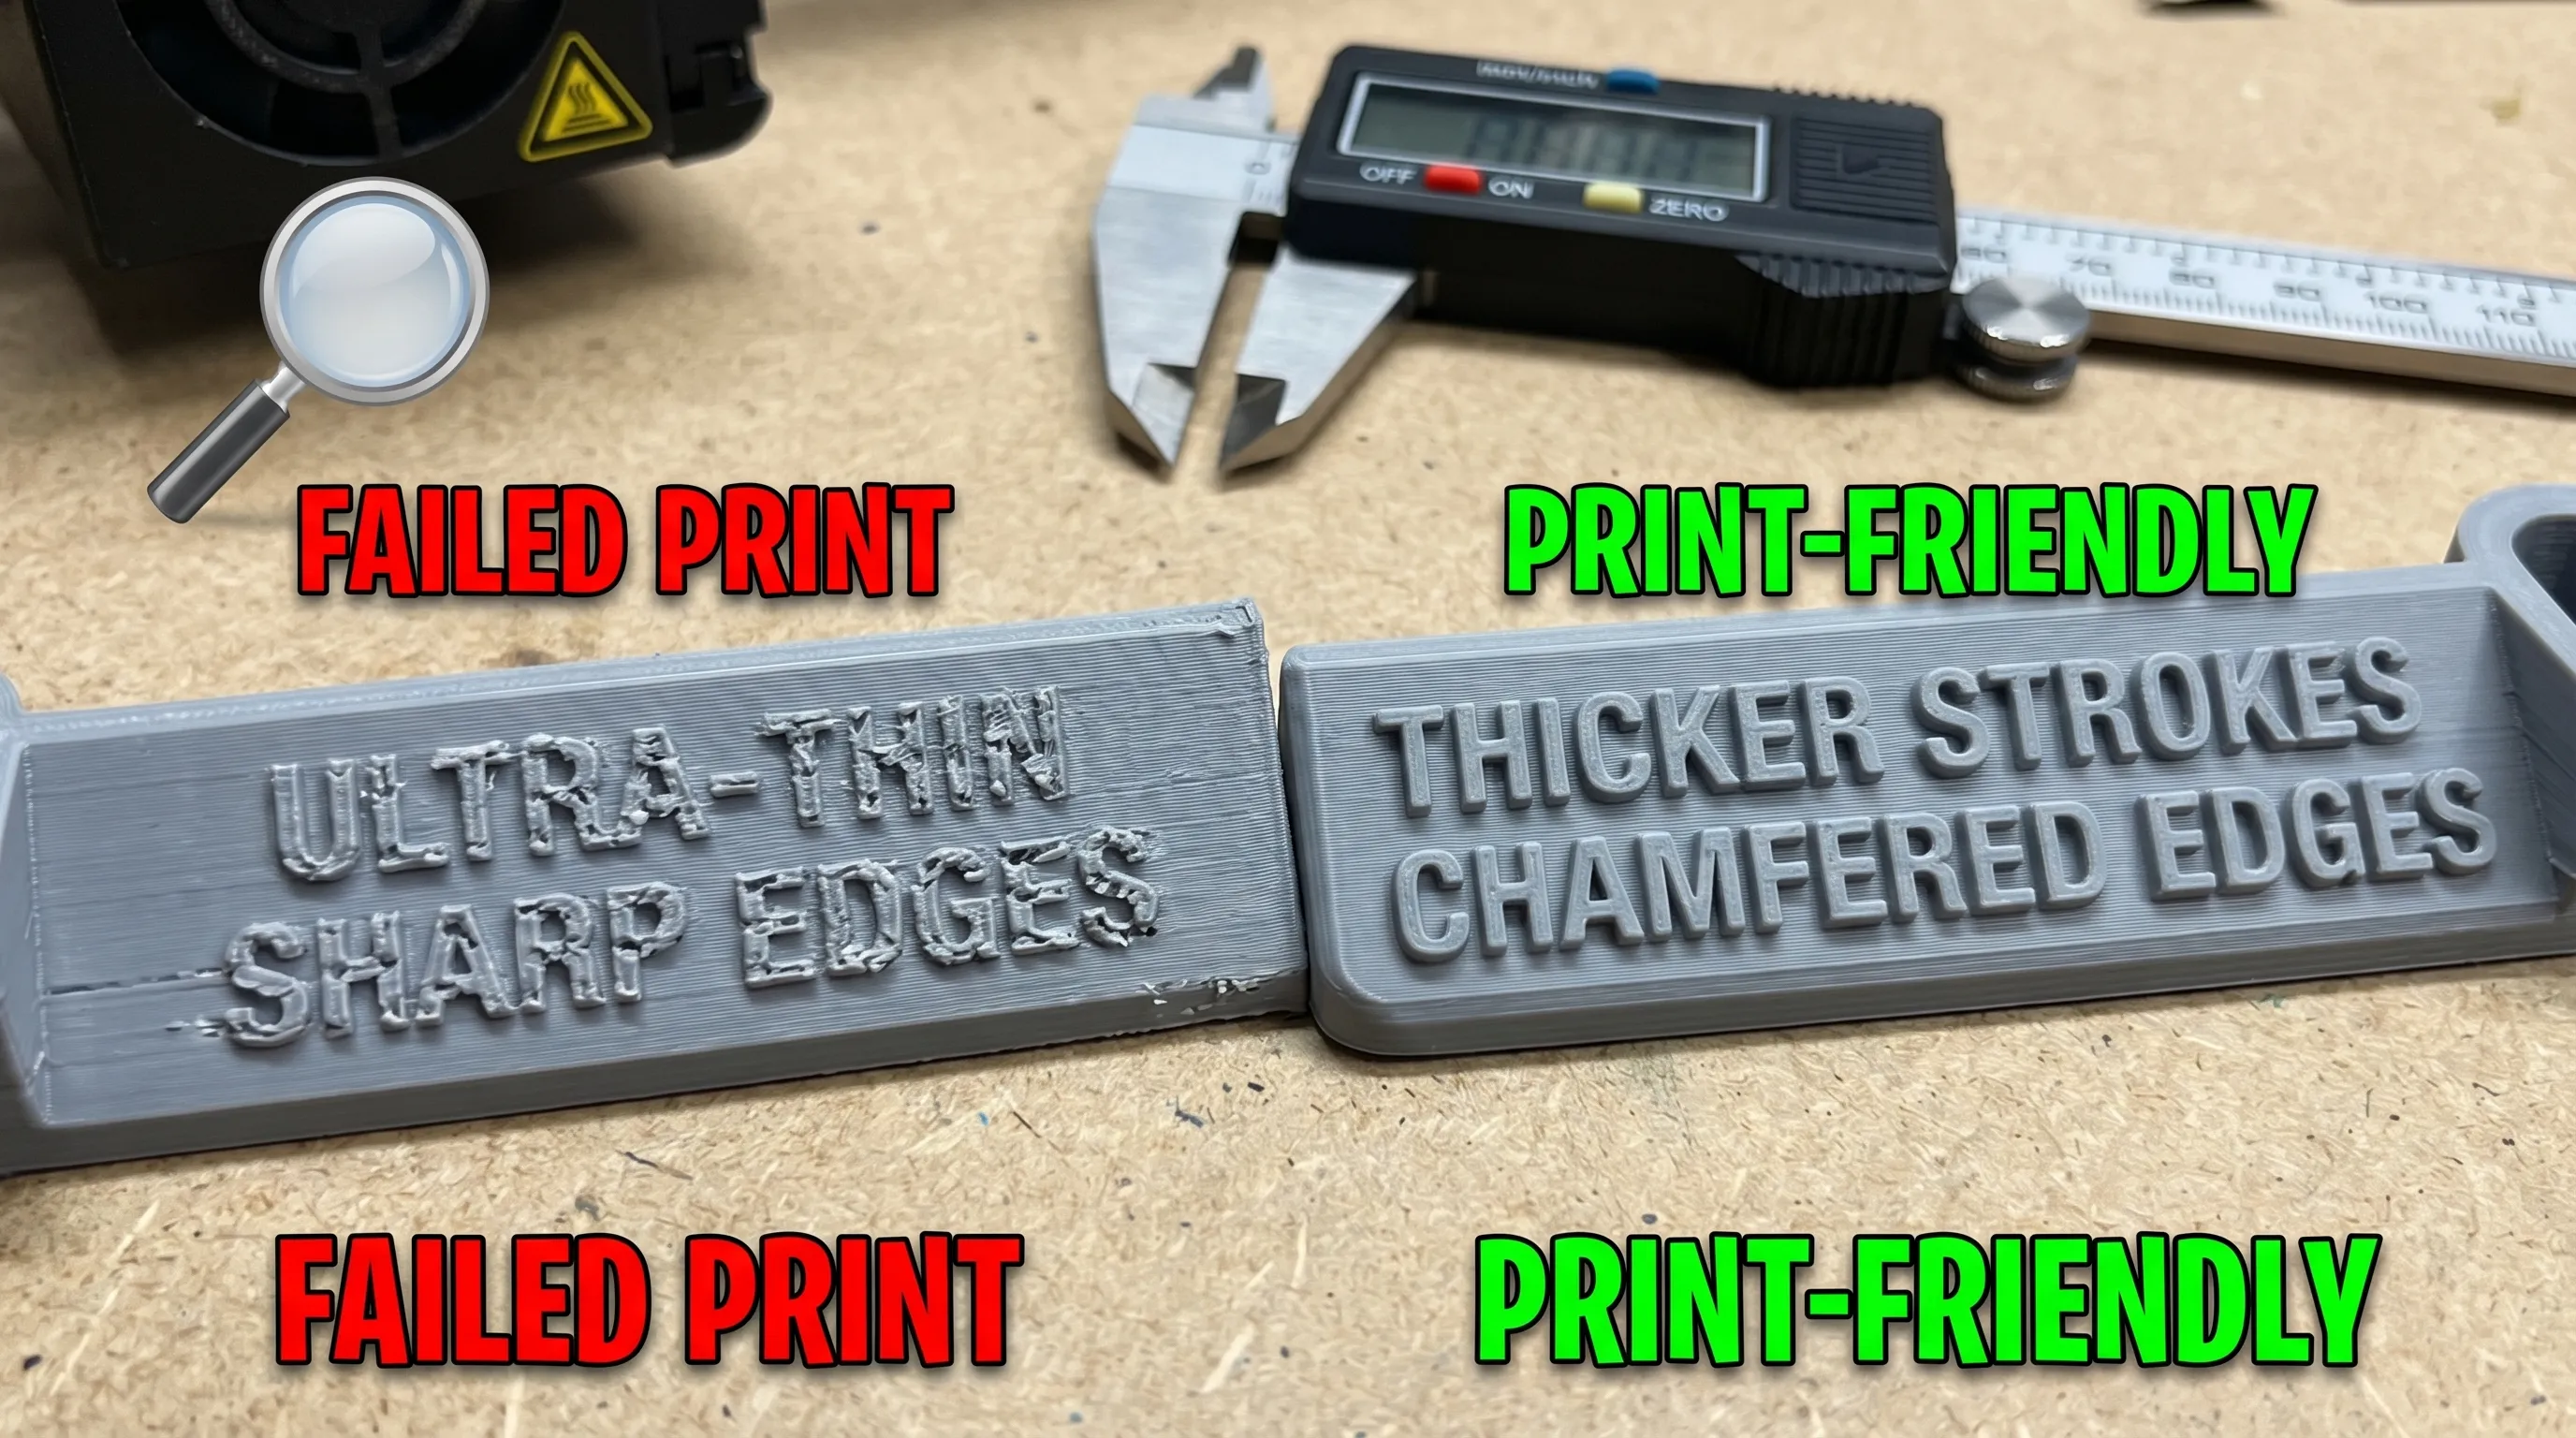
Make text and engravings readable
As a rule, embossed and engraved text prints best when:
- Stroke widths are not razor-thin
- Depth is enough to survive sanding/priming
- Letters are not packed too tightly
If your design relies on tiny text, consider making it a recessed plaque area so the user can swap in different sizes depending on print method.
Avoid “almost zero” edges
Knife edges tend to curl, chip, or disappear. Instead of tapering to 0 mm:
- End blades, fins, and wings with a small flat (even if it is subtle)
- Use a trailing-edge thickness that survives handling and support removal
For process-specific design rules, manufacturer guides can be useful references, such as Formlabs’ resources on designing for resin printing and Prusa’s knowledge base for FDM behavior.
Hidden traps: enclosed volumes, drainage, and warping
Some models are “hard” not because of their visible geometry, but because of what you cannot see.
Enclosed cavities and trapped resin (resin printing)
If a resin model is hollow, it often needs vent and drain holes to prevent suction forces during printing and to allow uncured resin to escape. Even if you are not printing it yourself, designing with proper drainage in mind makes the job safer and more predictable.
Large flat surfaces and warping (FDM and some materials)
Big flat plates love to warp due to uneven cooling. A print-friendly approach is to:
- Add ribs underneath instead of making a thick slab
- Use gentle fillets on transitions to spread stress
- Break large plates into smaller interlocking panels
Material choice also matters. PLA is typically easier and more dimensionally stable than ABS in open-air printing, while engineering materials may need controlled environments.
When “easy to print” also means “easy to ship and store”
If you are designing parts meant to be ordered repeatedly, think beyond the printer:
- Can the model be nested to reduce shipping volume?
- Can fragile features be printed separately and packed safely?
- Can the part be stored without deformation (heat-sensitive plastics in hot delivery trucks)?
For businesses scaling up production or setting up a dedicated workspace, secure, dry storage for materials and finished parts becomes important. Some makers even convert containers into compact production or storage areas. If you are exploring that path, a practical starting point is to buy shipping containers online and plan the space around humidity control and temperature stability.
A quick “printability score” checklist for designers
If you want a fast self-review before you upload or sell a file, ask:
- Does it print with minimal supports, or are supports only on hidden faces?
- Are walls and small features thick enough to survive handling?
- Does the design offer at least one stable orientation with a decent base?
- Are holes, snaps, and mating parts designed with realistic clearances?
- Could a first-time buyer print it successfully without custom slicer tricks?
If you can answer “yes” to most of these, your model is likely easy to print across many machines.
Frequently Asked Questions
What overhang angle is considered easy to print? Many FDM prints do fine around 45 degrees from vertical, but it depends on cooling, layer height, and geometry. Resin behaves differently, so design for minimal large flat overhangs either way.
How can I design a model that needs fewer supports? Use chamfers instead of flat shelves, add fillets, split the model into parts that can be oriented flat, and place unavoidable overhangs on non-cosmetic surfaces.
Why do my printed holes come out too small? Holes often print undersized due to toolpath approximation, material pull-in, and first-layer squish. Add a small entry chamfer, use teardrop holes, or plan to drill to final size.
What clearance should I use for parts that fit together? As a starting point, many designers use roughly 0.3 to 0.5 mm for FDM slip fits and roughly 0.15 to 0.3 mm for resin slip fits, then test and adjust.
Are print-in-place hinges and moving parts “easy to print”? They can be, but only if you design generous clearances, avoid large rubbing surfaces, and ensure the first layers are stable. They are less forgiving than separate-part assemblies.
I have a design, but I’m not sure it’s printable. What should I do? Load it into a slicer to preview supports and problem areas, or send the file to a printing service for feedback before committing to a full run.
Bring your design to life with Firecloud Printz
If you have a model that is almost ready, or you want help making your 3D printing design more print-friendly, Firecloud Printz can help you turn the file into a high-detail physical part with a fast, reliable process. Explore the custom 3D printing services or browse the curated shop for designer-authorized prints, then request an estimate when you are ready to produce your next idea.