
Best Practices for Picking a 3D Model for 3D Printing
Choosing the right 3D model for 3D printing is the difference between a smooth, affordable print and a frustrating cycle of failed builds, brittle parts, and surprise rework. Even a beautiful model can print poorly if it has thin walls, non-manifold geometry, or details smaller than your chosen process can resolve.
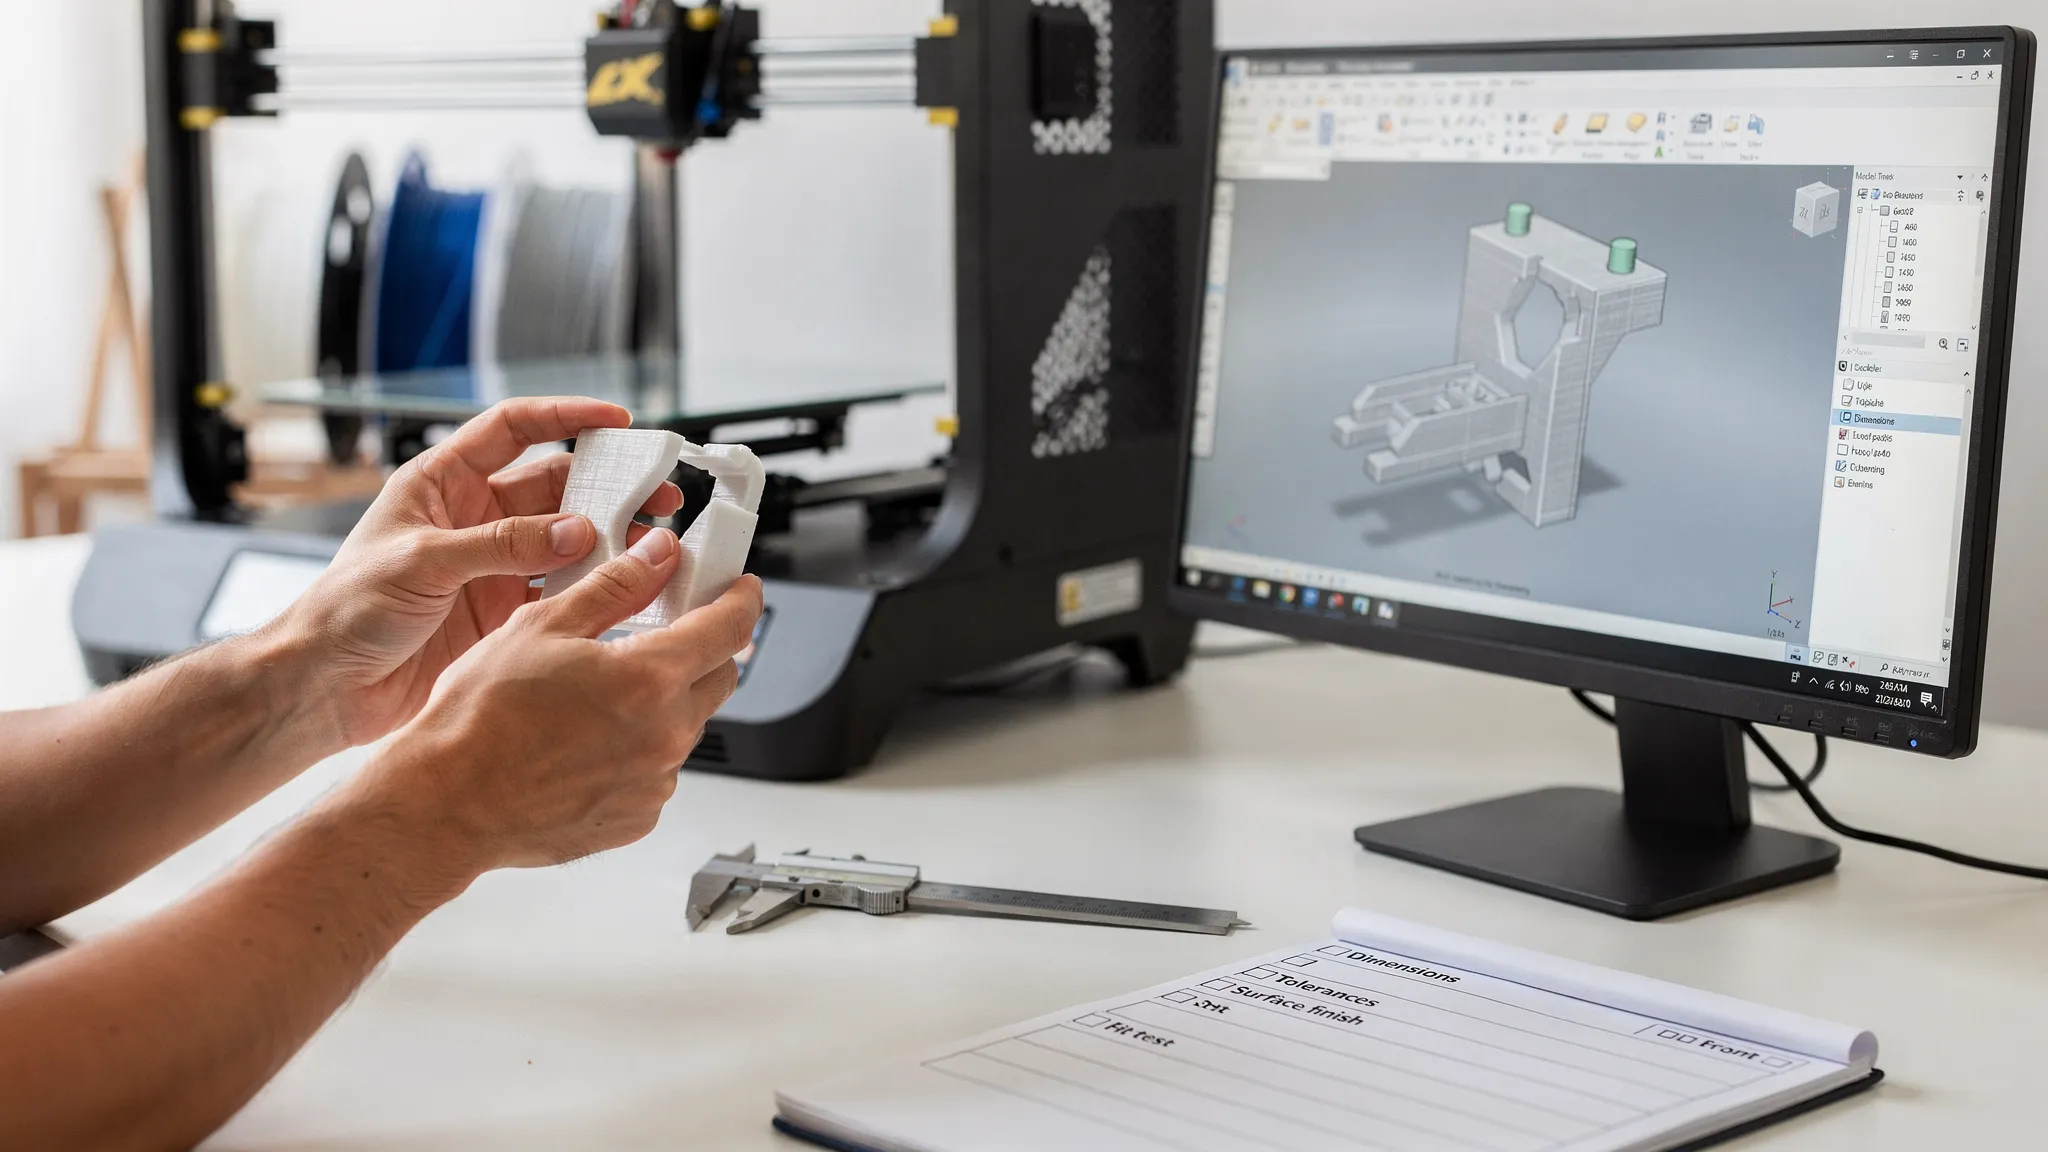
This guide walks through best practices to evaluate a model before you hit “order,” whether you are downloading a file, buying a designer-authorized model, or sending your own CAD.
Start with the end use (display, fit-check, or functional part)
A model that looks great on-screen is not automatically a good candidate for printing. First, define what “success” means:
- Display models and collectibles: prioritize surface detail, clean silhouettes, and smart splitting to hide seams.
- Fit-check prototypes: prioritize overall dimensions and tolerances, accept simpler surfaces.
- Functional parts: prioritize strength direction, wall thickness, fillets, and realistic load paths.
If you are not sure which print process or material best matches your use case, Firecloud Printz covers the tradeoffs in their broader overview of technologies and materials in Additive Printing Explained: Materials, Uses, and Benefits.
Pick models that are “print-ready,” not just “render-ready”
Many marketplace files are optimized for rendering, animation, or gaming. For printing, you want models that are engineered as solids.
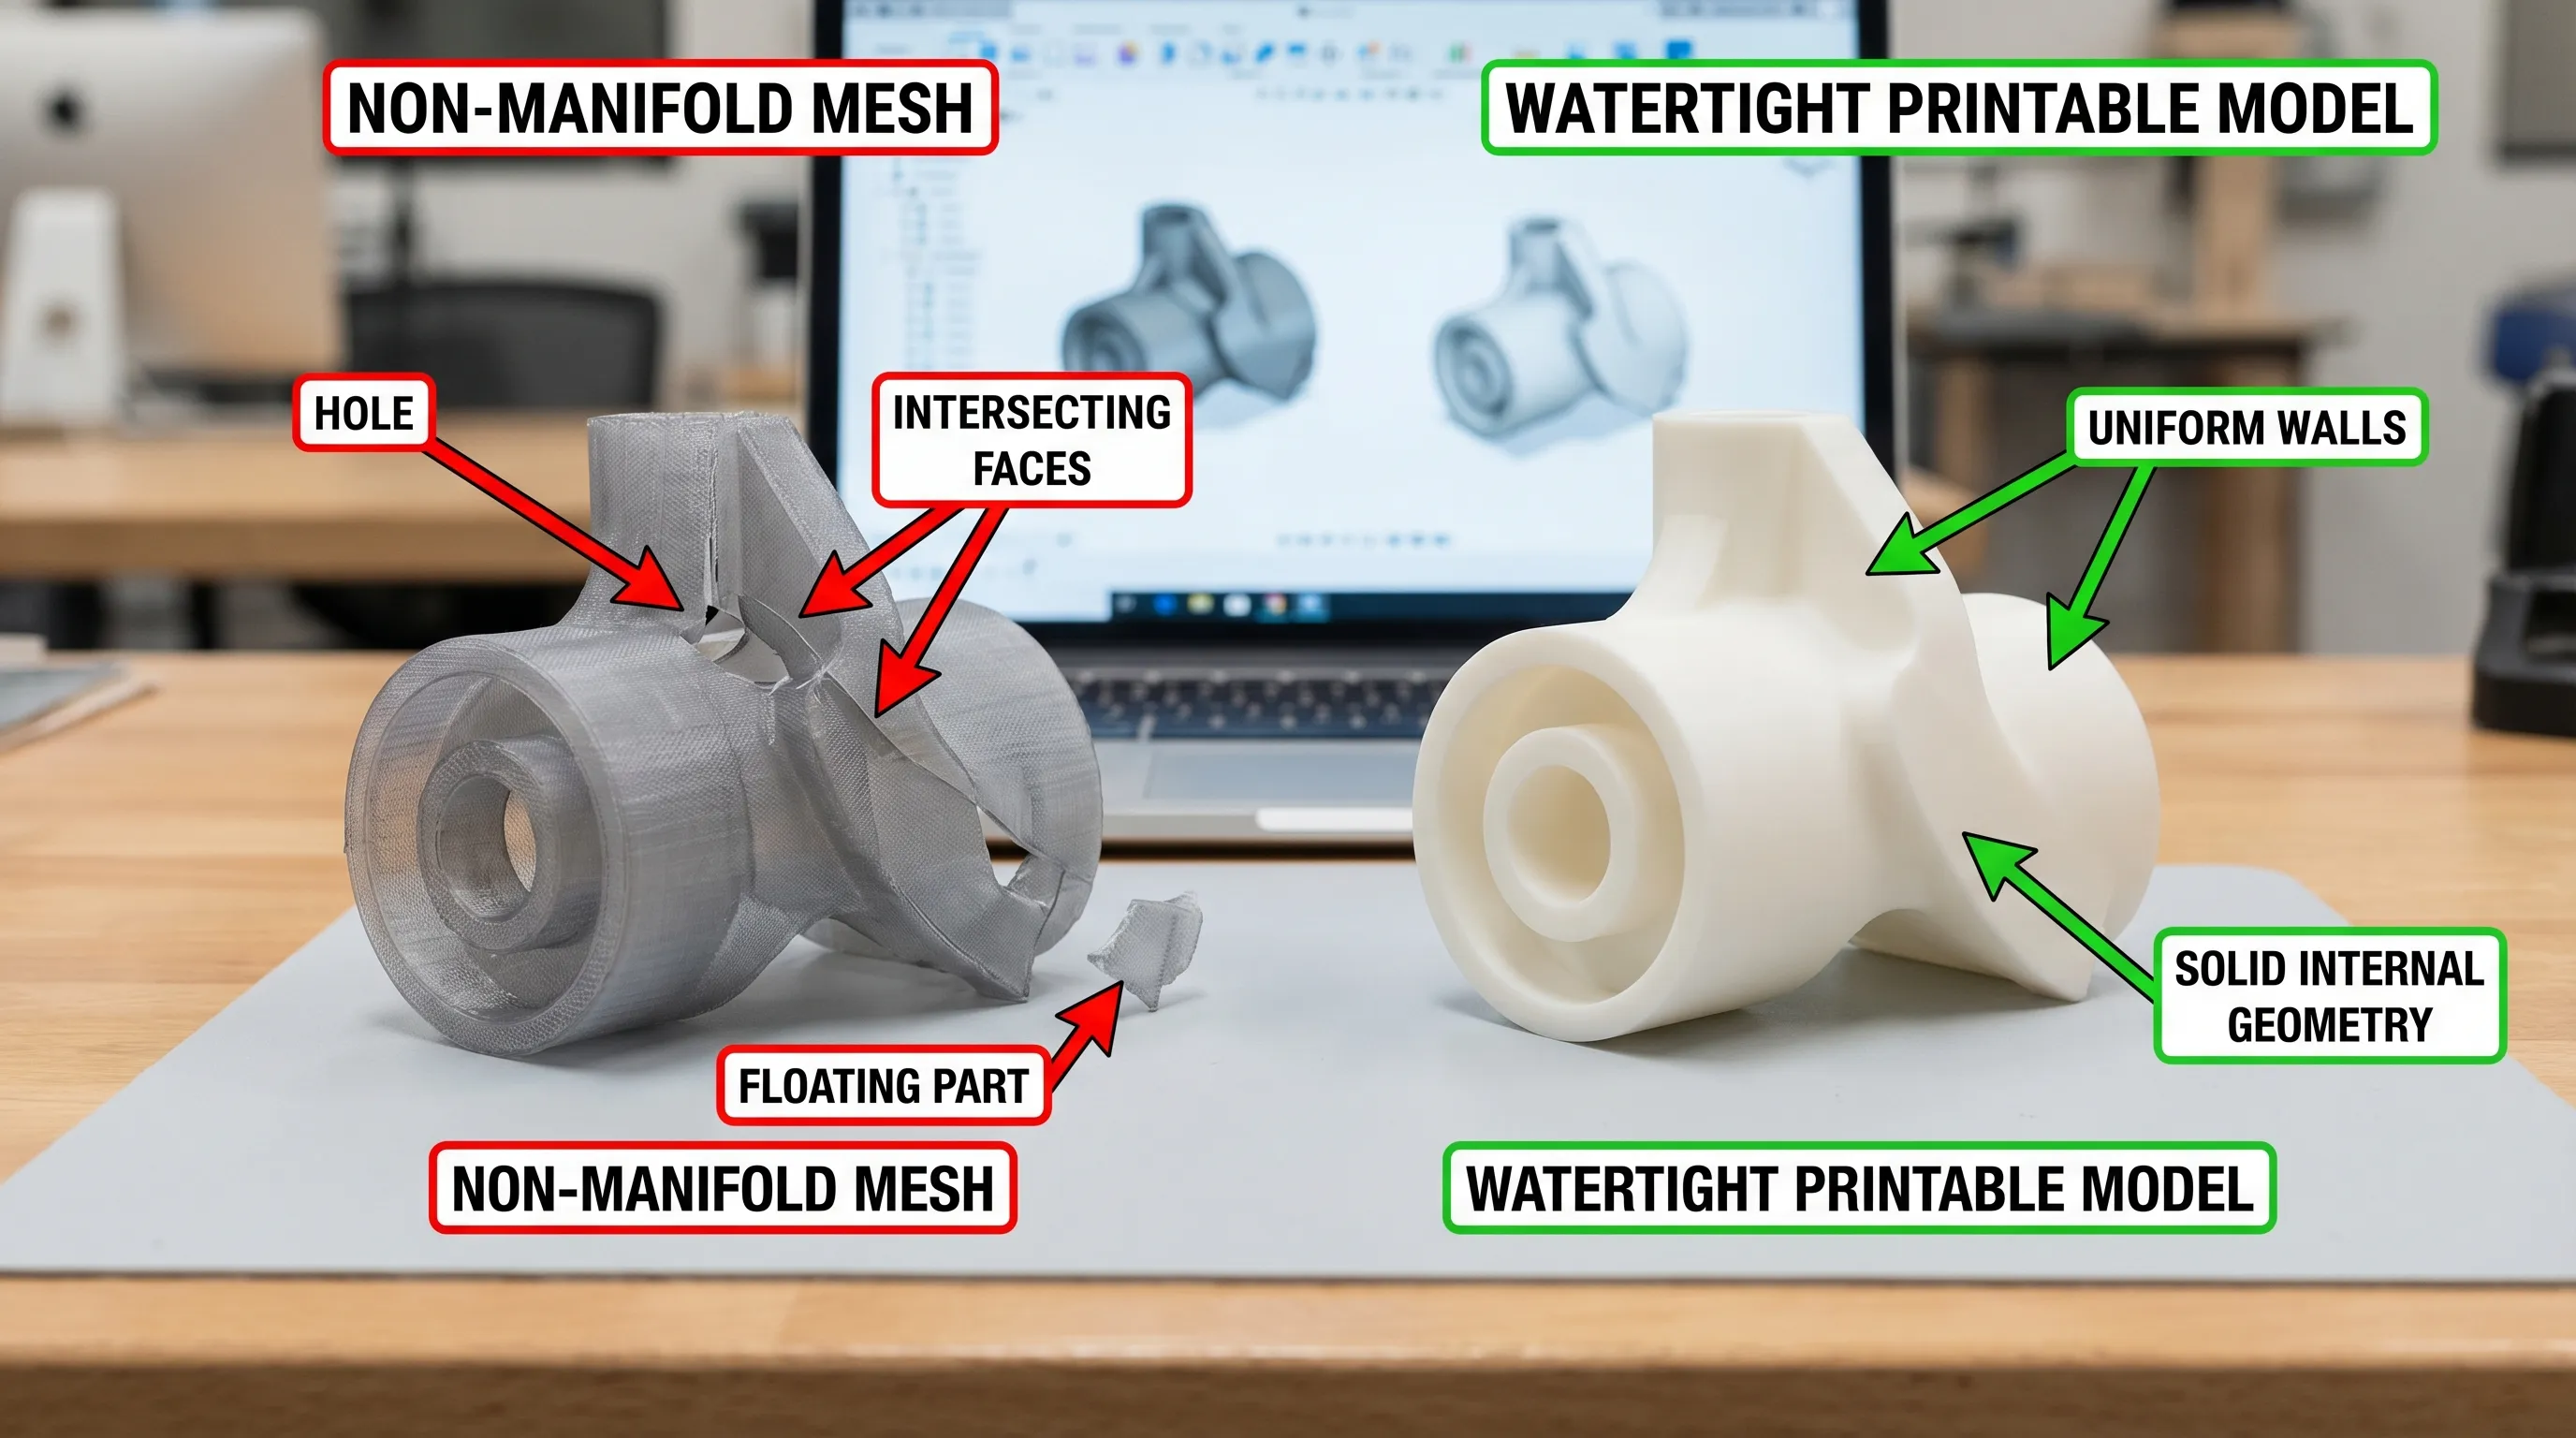
Geometry must be manifold (watertight)
A printable mesh should be closed and watertight so the slicer can interpret a real volume.
Common problems that cause slicing errors:
- Holes or missing faces
- Self-intersecting surfaces
- Internal faces or duplicated shells
- Zero-thickness surfaces (planes) pretending to be walls
Best practice: run a mesh check in tools like Blender, Meshmixer, or your slicer’s repair feature before submitting.
Avoid “infinitely thin” details
A sword blade, cape edge, or ornamental leaf might be modeled as a single surface. In 3D printing, that is either unprintable or extremely fragile.
Best practice: ensure every feature has real thickness, and that thin elements connect to the body with enough contact area to survive handling.
Validate scale and units before you commit
One of the most common ordering issues is a model exported in the wrong unit (inches interpreted as millimeters, or vice versa). A part intended to be palm-sized can arrive microscopic, or comically oversized.
Best practice:
- Confirm the model’s units in the source software (mm is common for printing).
- Measure at least 2 to 3 known dimensions (overall height, hole diameter, key mating faces).
- If the model is a character or prop, sanity-check scale against a reference (for example, 28 mm miniatures, 1:10, 1:6).
Plan for shrink, fit, and tolerance (especially for assemblies)
Even when printers are accurate, assemblies need breathing room.
Practical guidance:
- For sliding fits, include clearance rather than relying on “perfect” dimensions.
- For press fits, design test coupons first if the fit is critical.
- For threaded parts, consider printed thread limits and whether inserts or redesign is smarter.
Because tolerances vary by process, the best move is to share your functional intent when requesting an estimate so your print provider can flag risks early.
Check minimum wall thickness and fragile features
Wall thickness is where a lot of models fail in the real world, especially decorative shells.
What to look for in the model
Instead of aiming for a single number (it depends on process and material), evaluate the model structurally:
- Are there long, thin cantilevers (fingers, spikes, antennas)?
- Are there paper-thin shells that will warp or crack?
- Are small pegs expected to survive repeated assembly?
Best practice: thicken delicate regions, add fillets where thin features meet the main body, and avoid sharp internal corners.
Design with orientation, supports, and “clean surfaces” in mind
You can often predict whether a model will need heavy support just by looking at it.
Overhangs and support scars
Supports are not “free.” They add time, cost, and surface cleanup. If the model’s best-looking surface is also the surface that will be covered in supports, you may end up sanding in the worst possible place.
Best practice:
- Rotate the model so the most important surfaces print cleanly.
- Add flat “registration” faces where supports can attach harmlessly.
- Consider splitting the model to reduce overhangs.
Split large or complex models intentionally
Big prints and complex geometry are often best as multiple parts.
Best practice:
- Split along natural seams (clothing lines, armor plates, panel lines).
- Add alignment keys (simple pins and sockets) with realistic clearance.
- Plan glue surfaces with enough area to bond.
Match detail level to your printing method
Highly detailed sculpts, embossed text, and micro-features are not equally achievable across all processes.
A simple rule: if the model’s “wow factor” comes from very fine detail, choose a printing approach that can capture it, and avoid scaling the model down too far.
Quick model-to-process fit check
Use this as a sanity check before you order.
| Model characteristic | Safer choice | Higher-risk situation | What to do instead |
|---|---|---|---|
| Tiny embossed text, fine facial detail | High-resolution printing | Low-resolution settings or very small scale | Increase text depth/size, scale up, simplify |
| Large flat panels that must look smooth | Processes that minimize visible stepping | Unavoidable layer lines on show faces | Reorient, split, plan finishing |
| Load-bearing brackets, clips, hinges | Designs with thick sections and fillets | Thin, sharp corners under load | Reinforce geometry, redesign stress points |
| Organic statues with big overhangs | Split for hidden seams | Single-piece print with heavy supports | Separate into parts, reduce overhang angles |
(If you share the file and intended use, Firecloud Printz can help flag potential issues before printing without you having to guess.)
Choose the right file format and export settings
Most print workflows accept STL, but 3MF can preserve more information (like units and multiple bodies) depending on software.
Best practice:
- Export with enough mesh resolution to avoid faceting on curves, but not so dense that the file becomes unmanageable.
- Apply transforms before export (scale, rotation) so your part does not arrive sideways or at the wrong size.
- If the model is an assembly, export in a way that preserves separate bodies when helpful.
Respect licensing and designer authorization
If you are printing a purchased or downloaded model, confirm you have the right to produce it, especially for commercial use.
Best practice:
- Look for clear license terms (personal vs commercial).
- If you are buying designer products, use authorized sellers when available.
Firecloud Printz notes that they offer designer-authorized products (including being an authorized Hive seller) in addition to custom printing, which can reduce licensing uncertainty for customers who want ready-to-print designs.
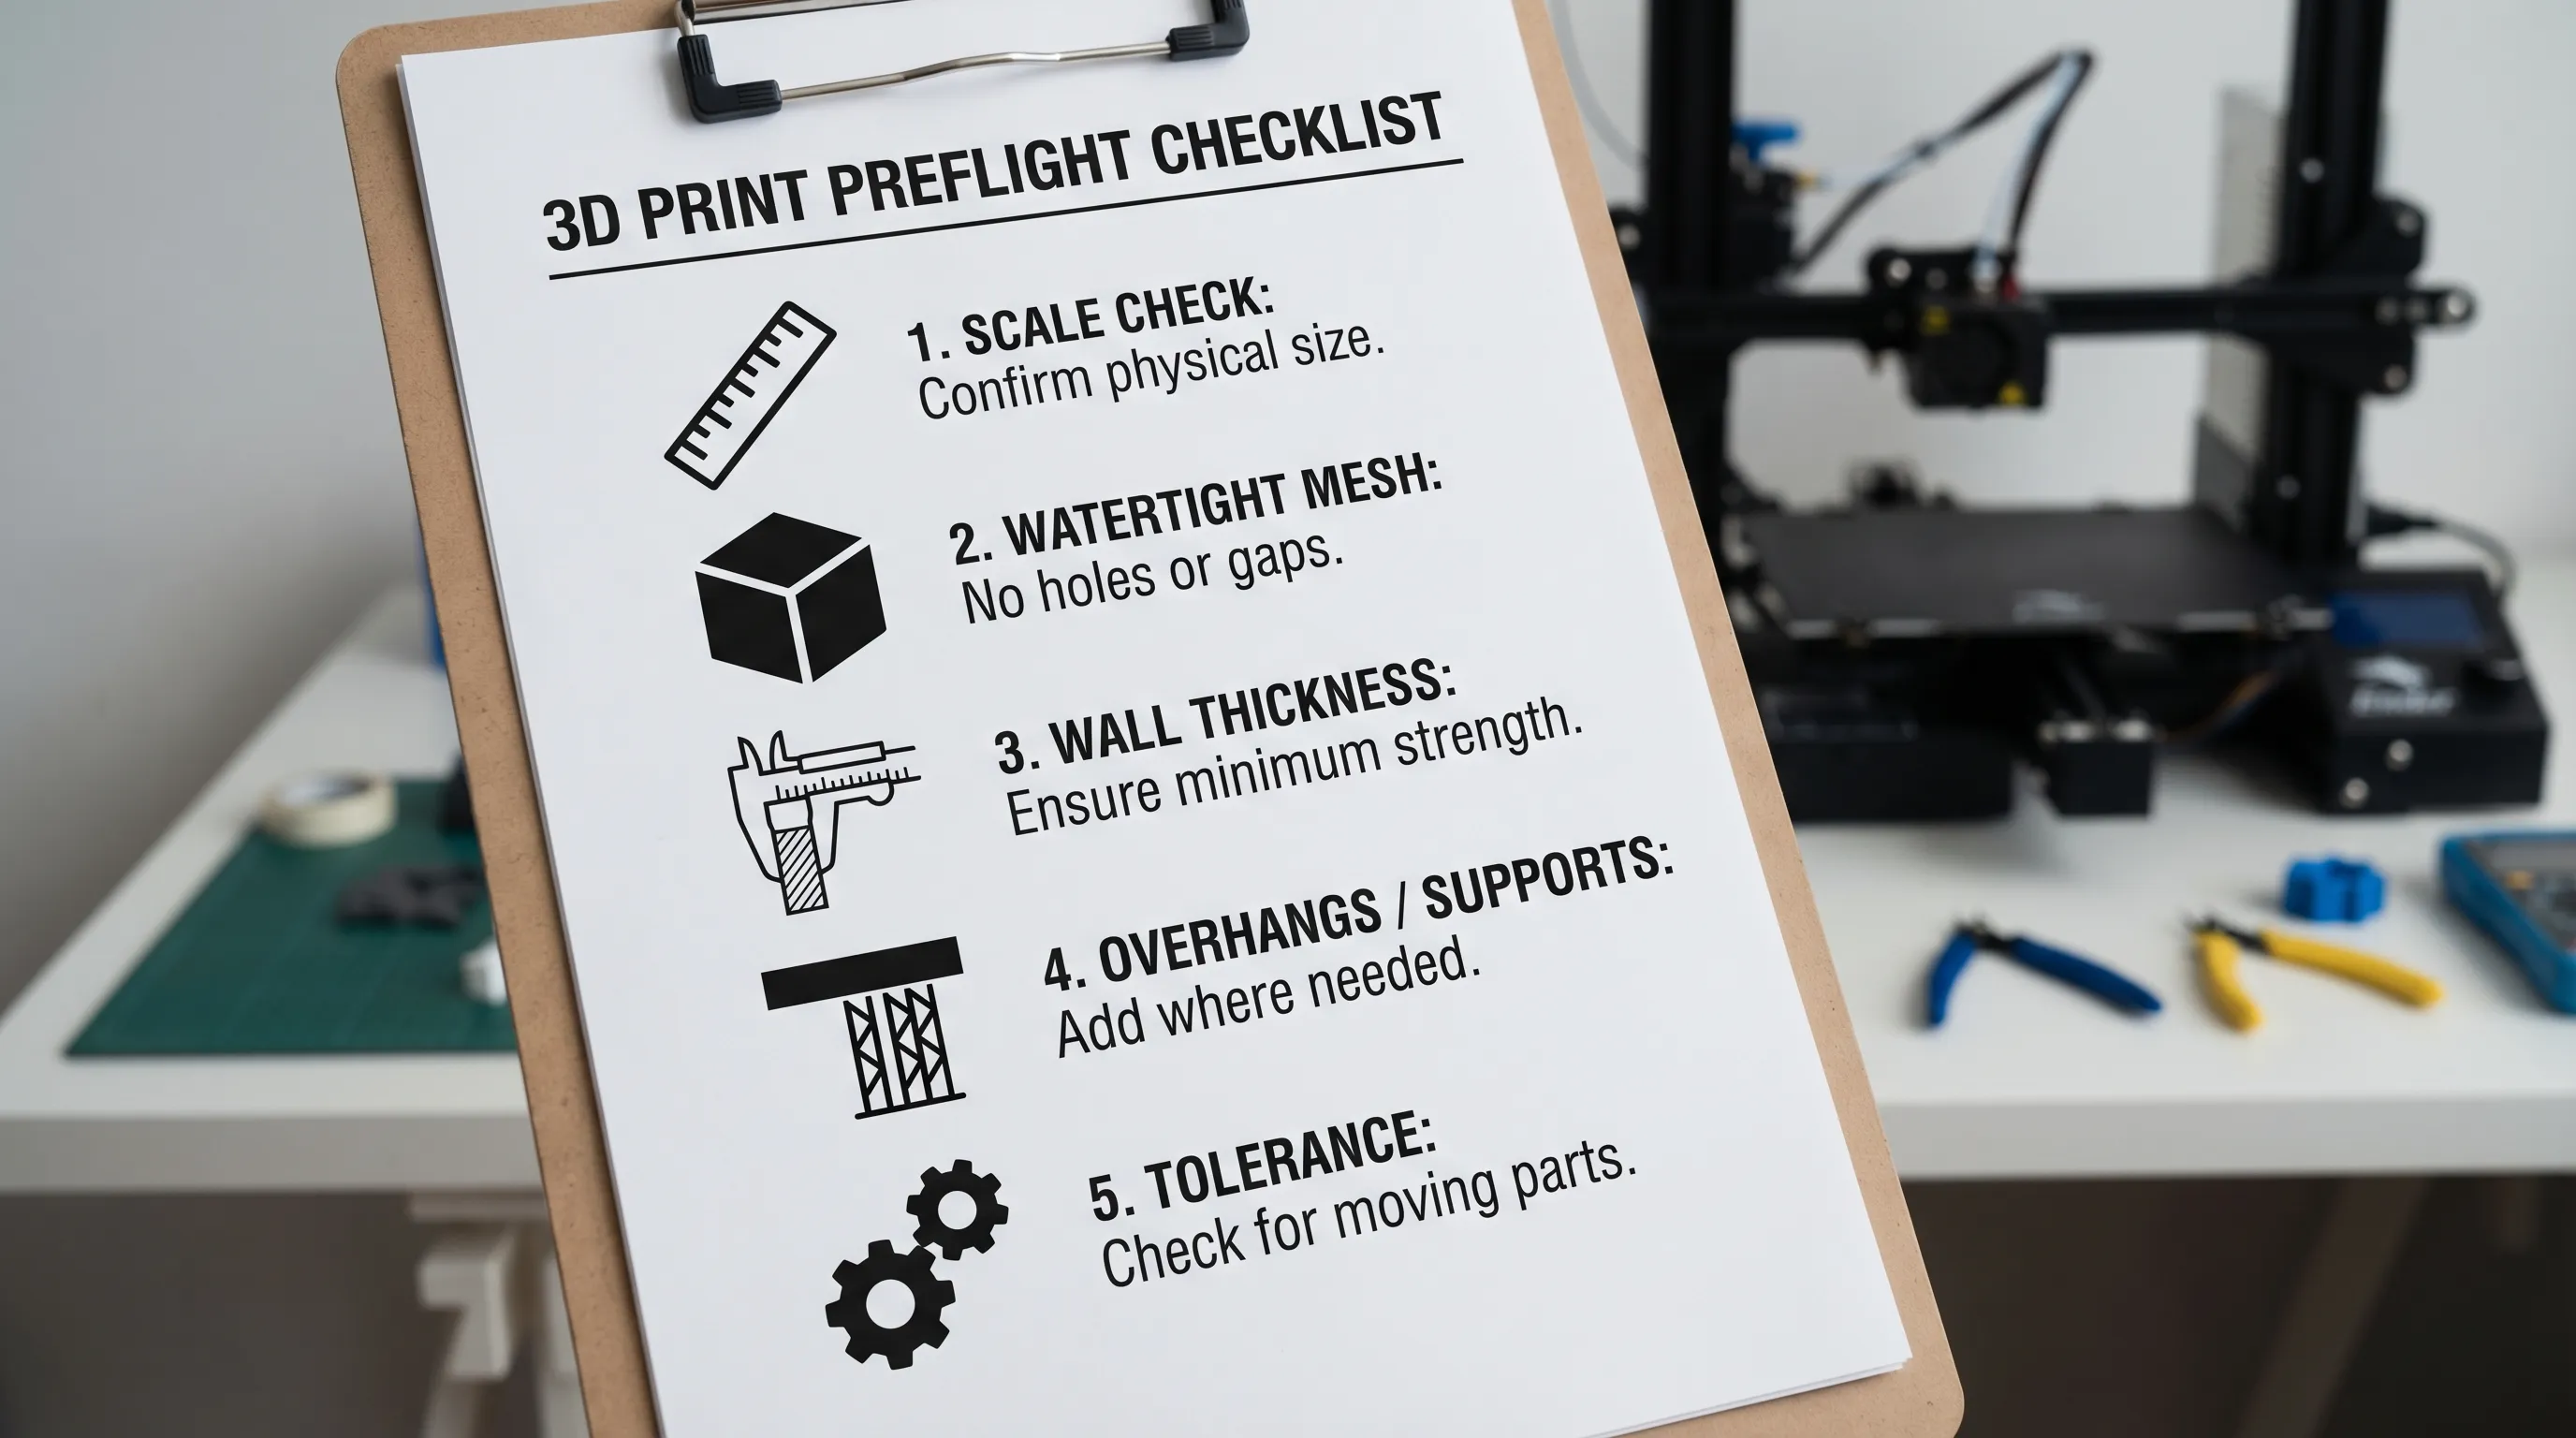
Preflight checklist before you upload a model
Run this quick checklist to catch the most common “why did this fail?” problems.
- The model is watertight (manifold), with no non-solid surfaces.
- Scale and units are confirmed, key dimensions checked.
- Thin walls, spikes, and tiny pegs have been reinforced.
- Overhang-heavy areas are reoriented or split to reduce supports.
- Assembly fits include realistic clearance.
- The exported file is clean (correct format, transforms applied).
When your “model choice” depends on logistics and space
Sometimes picking the right model is also about where and how you will use it. Large prints, jigs, or custom fabrication workflows often benefit from dedicated storage and staging space for materials, finished parts, and tools.
If you are building a small-scale production setup, a secure, weather-resistant container can be a practical option. For businesses exploring that route, premium shipping containers can offer a straightforward way to add lockable storage or workspace capacity without a full building expansion.
Frequently Asked Questions
What makes a 3D model printable? A printable model is watertight (manifold), has real wall thickness, and avoids geometry errors like holes, self-intersections, and internal faces that confuse slicing.
What file type is best for a 3D model for 3D printing? STL is the most common. 3MF is often better when you want units and multi-part information to carry through reliably, depending on your software.
Why does my model need to be “watertight”? Slicers need a closed volume to determine what is “inside” and “outside.” Open surfaces or gaps can cause missing layers, strange fills, or failed toolpaths.
How do I know if thin parts will break? Look for long, thin features with small connection points (spikes, fingers, antennas). Reinforce them, add fillets, or redesign to increase contact area and thickness.
Should I split my model into multiple parts? Often yes, especially for large models, heavy overhangs, or when you want cleaner visible surfaces. Splitting can reduce supports and improve finishing results.
Bring your model to life with Firecloud Printz
If you have a 3D model ready (or almost ready), Firecloud Printz can help you turn it into a high-detail physical print, whether it is a one-off custom piece or a designer-authorized product from their shop. Share your file and intended use, and request a quick order estimate at Firecloud Printz.