
3D Printing and Designing: A Beginner Workflow That Works
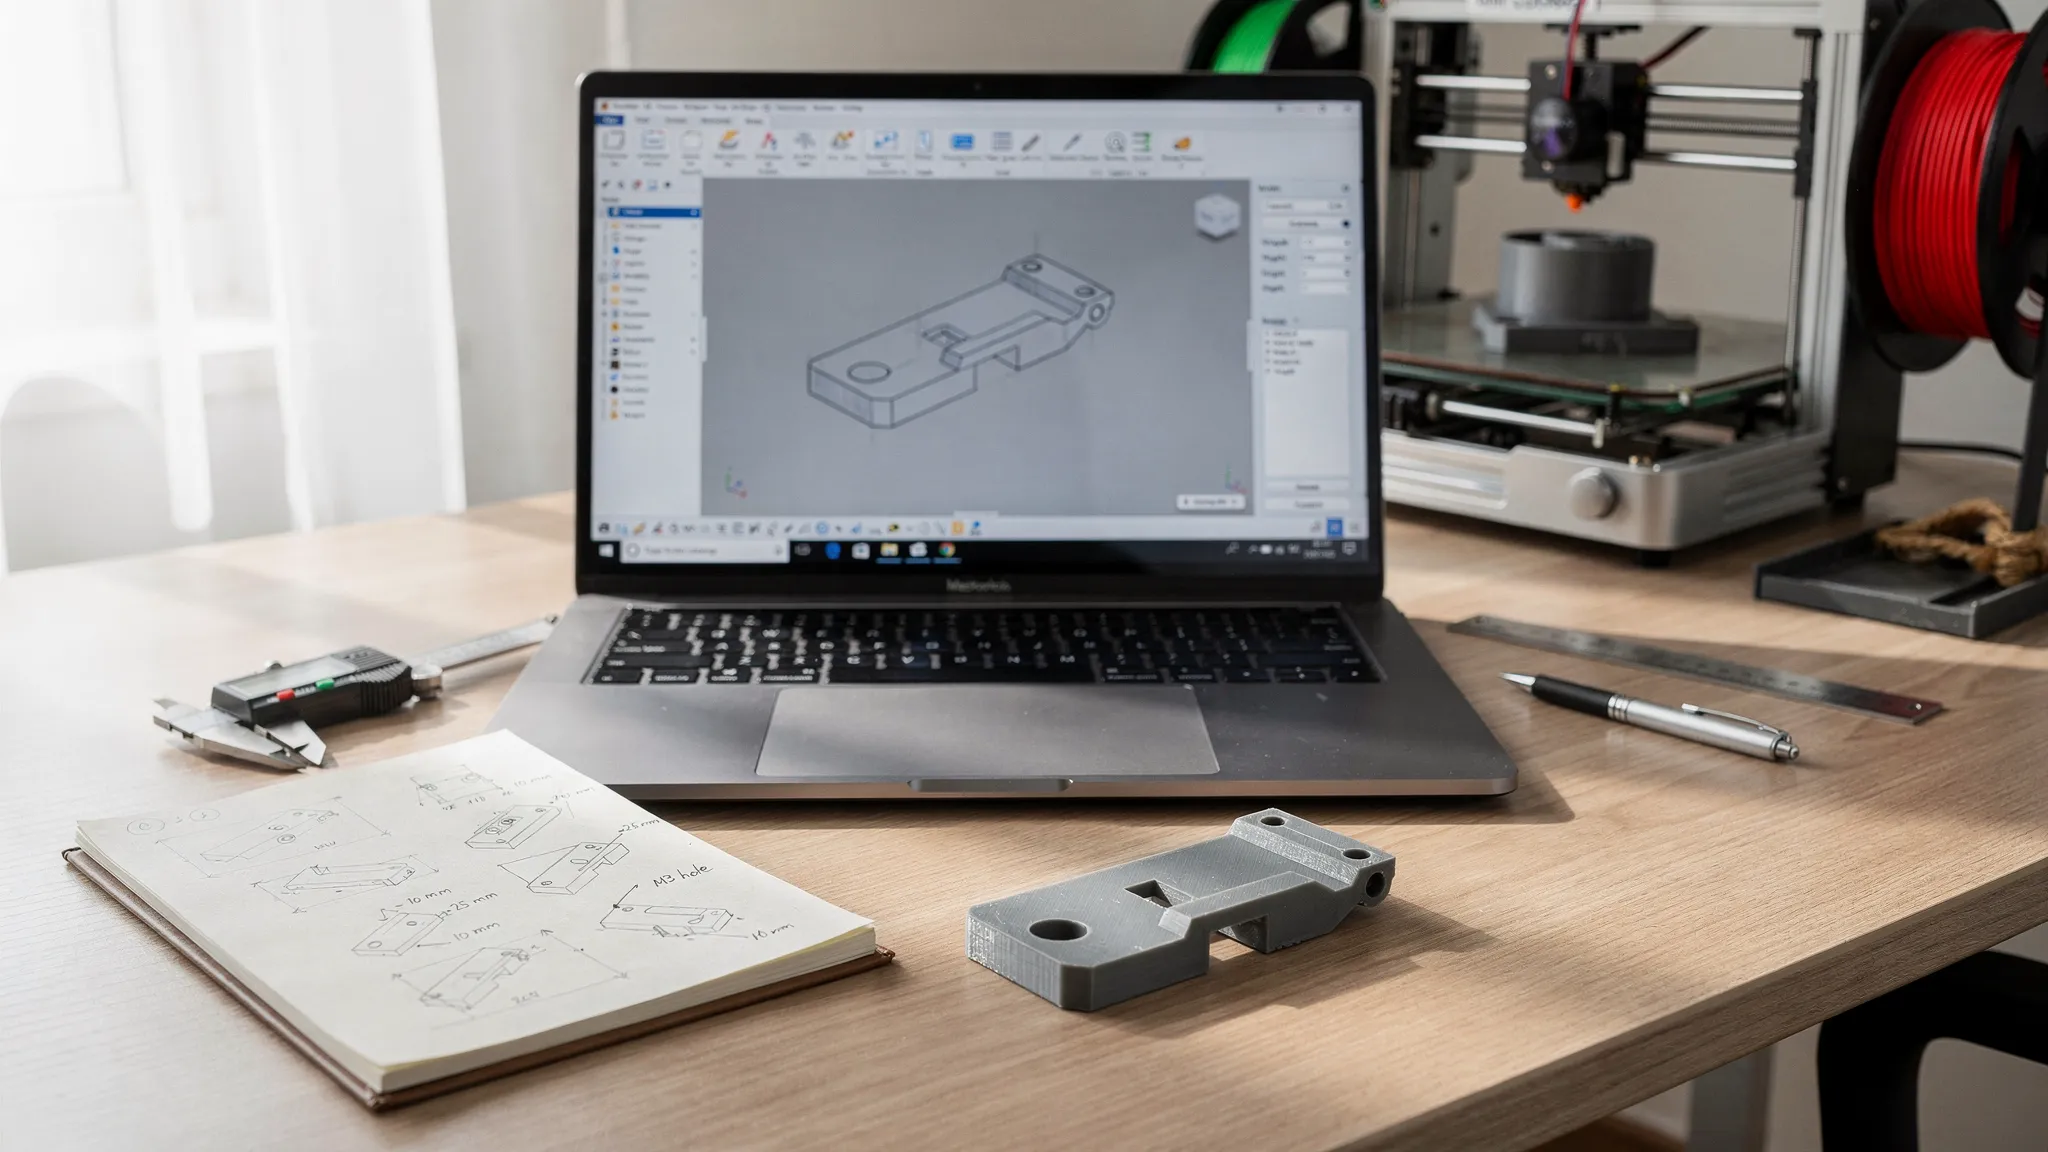
Designing your first printable part can feel like juggling two hobbies at once: learning CAD (or sculpting), and learning how printers behave in the real world. The good news is that you do not need a “perfect” design process to get great results, you need a repeatable workflow.
This guide is that workflow. It is built for beginners who want a practical path from idea to finished print, without getting lost in tools, jargon, or endless rework.
The beginner mindset: design for iteration, not perfection
In 3D printing and designing, most first attempts fail for predictable reasons: unclear requirements, tiny details that cannot print, parts that do not fit, or geometry that looks fine on-screen but is fragile in plastic.
A beginner-friendly workflow assumes you will iterate. That means you design so changes are easy:
- Prefer simple shapes and adjustable dimensions over intricate one-off geometry.
- Separate “looks good” from “must function.”
- Prototype early at low cost, then refine.
If you adopt that mindset, the rest of the workflow becomes straightforward.
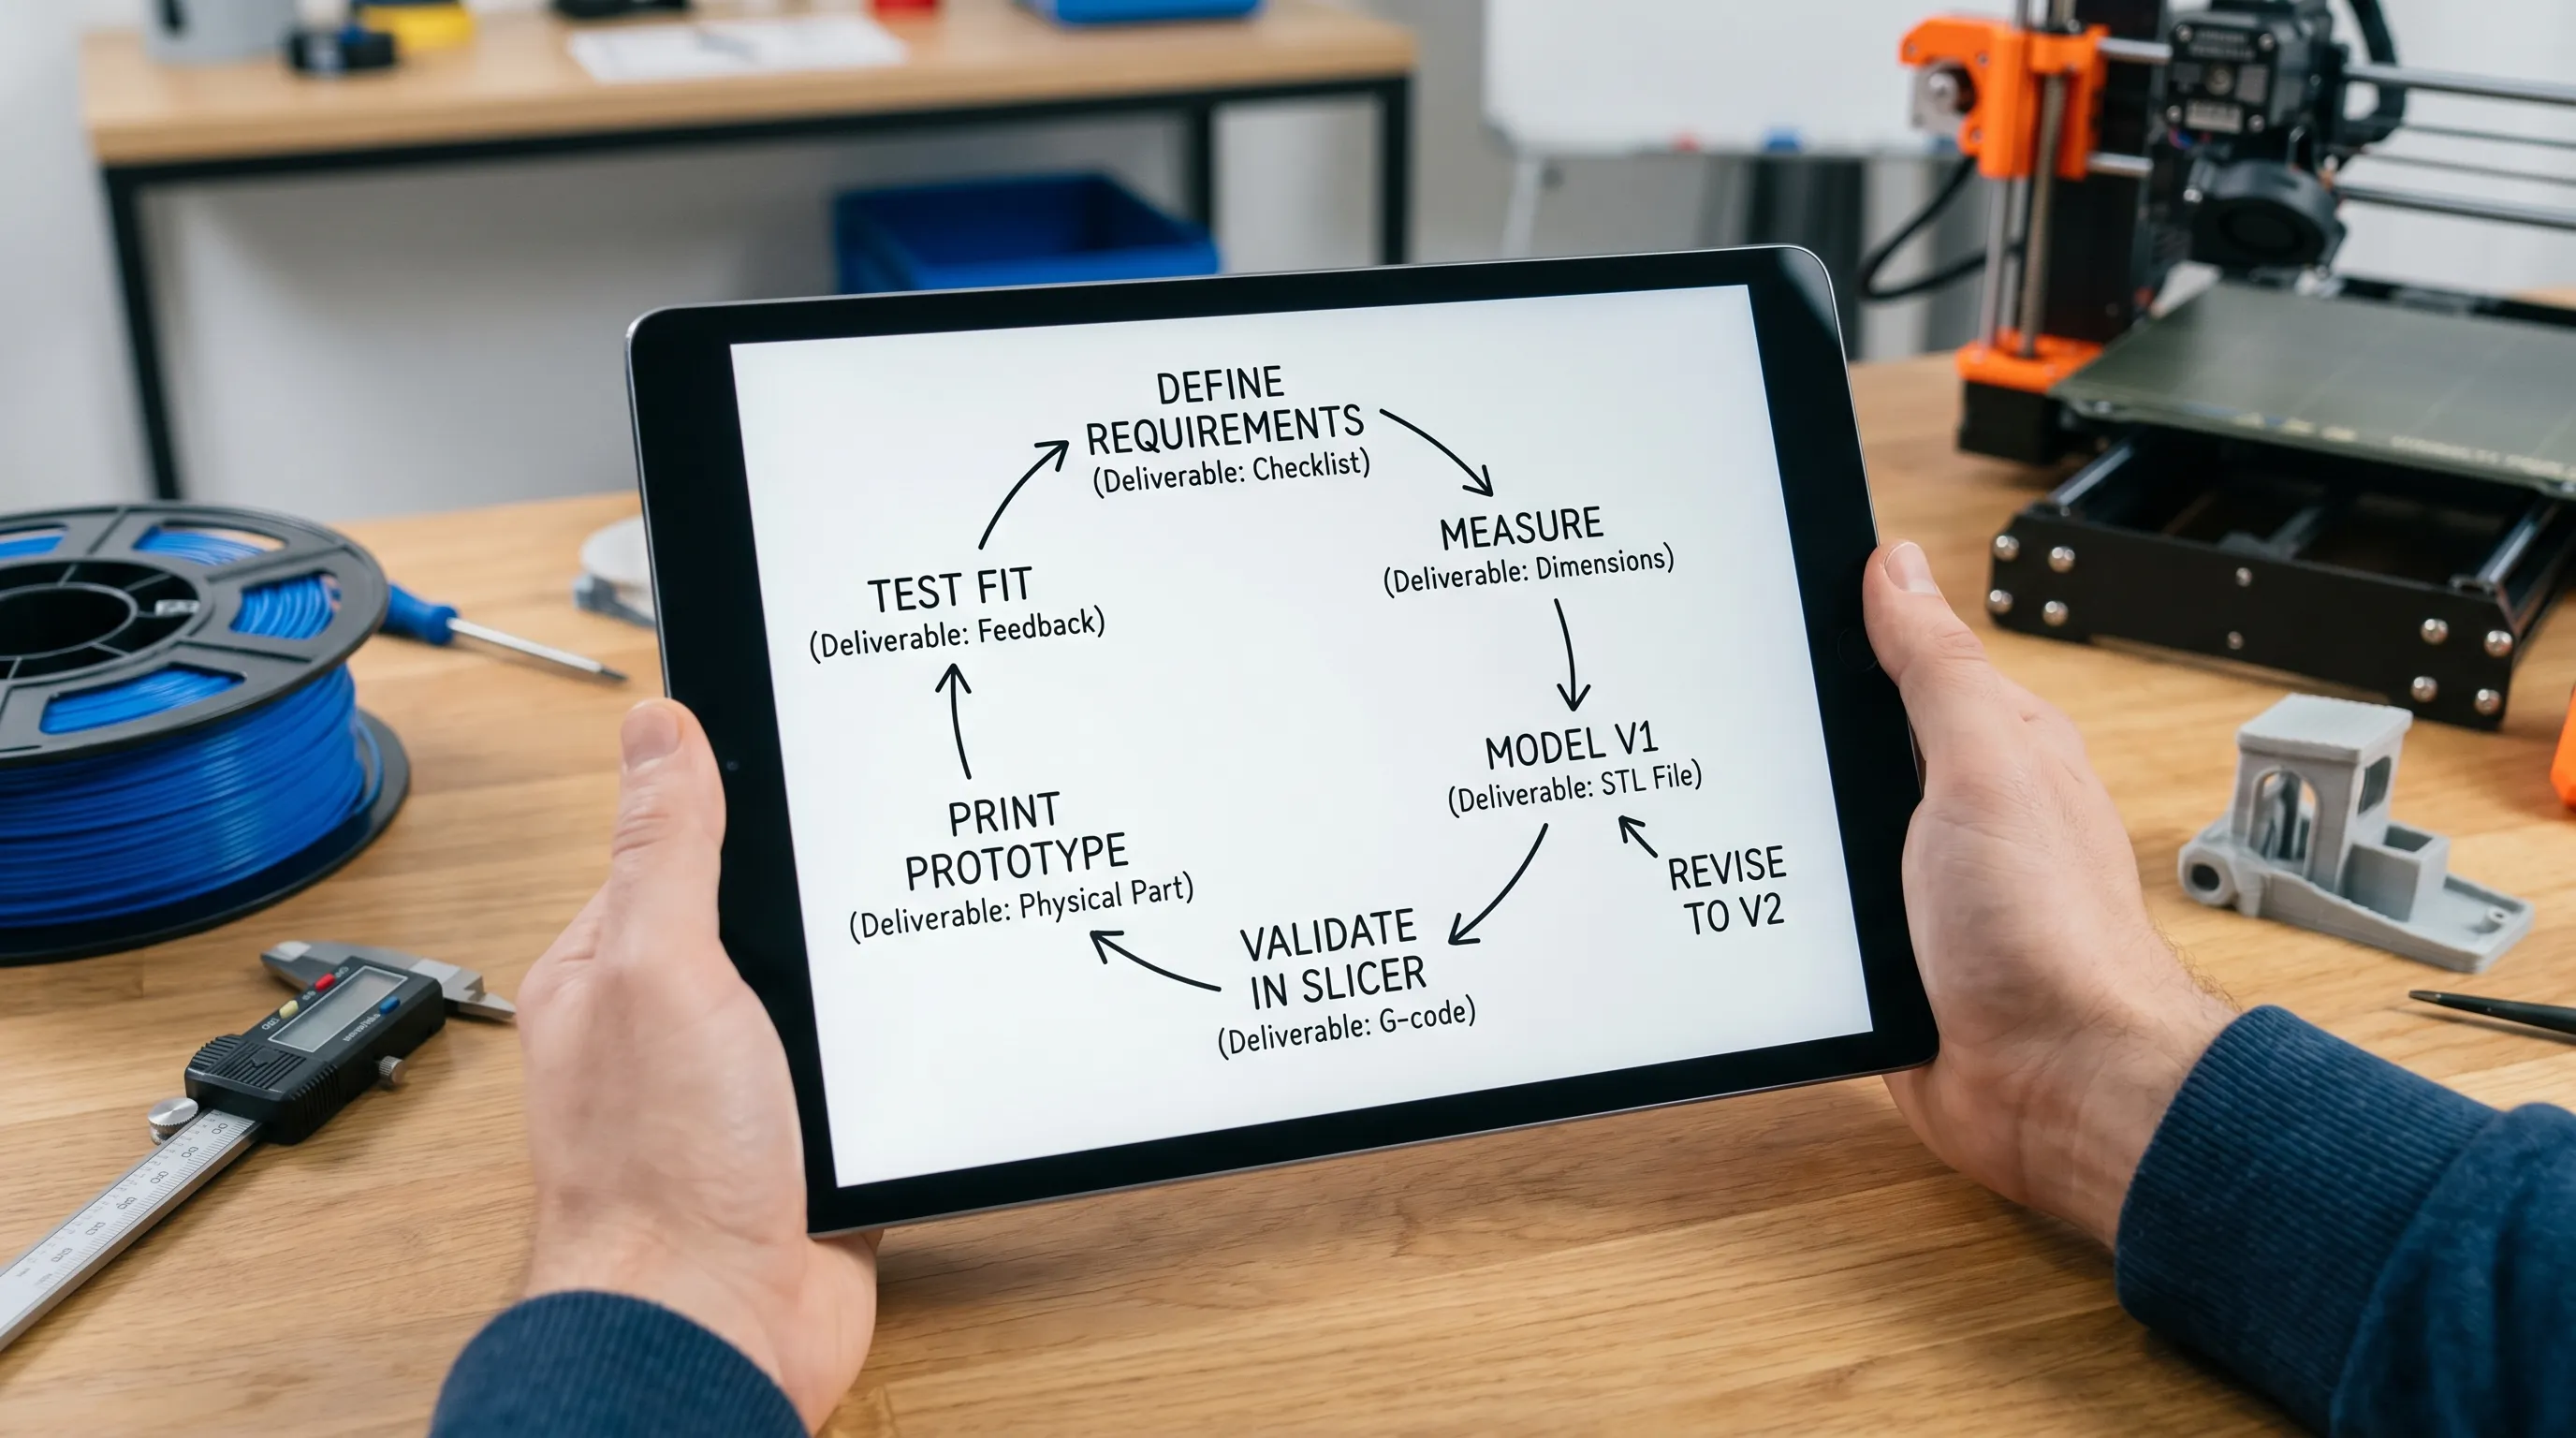
The workflow at a glance (with deliverables)
Use the table below as your checklist. Each step has a clear output so you always know what “done” looks like.
| Step | What you do | Output you should have before moving on |
|---|---|---|
| 1. Define the job | Clarify what the part must do and where it will live | A short requirement list (size, loads, environment, priorities) |
| 2. Measure and reference | Measure the real object, take photos, set units | Key dimensions and constraints (with tolerances) |
| 3. Pick a design approach | Choose CAD vs sculpting, choose parametric vs freeform | A tool choice and a plan for how you will edit later |
| 4. Model the V1 | Build the simplest version that can prove the concept | A clean model with correct scale and basic features |
| 5. Design for printing | Add clearances, fillets, wall thickness, support strategy | A print-aware V1 (not just a pretty model) |
| 6. Export and validate | Export STL/3MF, check manifold geometry, preview in slicer | A printable file with no obvious red flags |
| 7. Prototype and learn | Print a draft, test fit, record issues | Notes, photos, and measured changes for V2 |
| 8. Finalize for finish | Plan orientation, seams, post-processing, assembly | A final file and finish plan (paint, sanding, hardware) |
The rest of this article walks through each step with beginner defaults that work.
Step 1: Define what success means (and what does not matter)
Before you open any software, write a tiny “spec.” Keep it simple and concrete.
Ask these four questions
What is it? Example: “A bracket that mounts a small sensor under my desk.”
Where will it live? Indoors, outdoors, near heat, in a car, near water, etc. Environment drives material and geometry.
What forces does it see? Light load (cable clip), moderate load (hook), repeated stress (hinge), impact (tool holder). If you do not know, assume more load than you think.
What matters most? Pick one:
- Fit (must snap onto something)
- Strength (must not break)
- Appearance (must look clean)
- Detail (must capture texture)
This prevents a common beginner problem: trying to optimize everything at once.
Step 2: Measure like a designer (not like a guesser)
Bad measurements create bad prints. Most “my part does not fit” problems start here.
Practical measuring tips
- Use calipers if possible. If not, a ruler is fine for early prototypes, but do not expect perfect fit.
- Measure the same feature three times and take the middle value.
- Photograph the target object from multiple angles, then annotate the photos with dimensions.
- Decide units early (mm is standard for most 3D printing workflows).
If you are designing something that interfaces with existing products (shelves, enclosures, fixtures), treat those interfaces as sacred. Everything else can be flexible.
Step 3: Choose the right design tool for the job
Beginners often pick software based on popularity instead of the shape they need.
CAD vs sculpting (a simple rule)
Use CAD for functional parts: brackets, mounts, boxes, adapters, jigs, organizers. CAD makes dimensions, symmetry, and editing much easier.
Use sculpting for organic shapes: miniatures, character models, textures, decorative items.
Parametric is your friend
If you can, design parametrically (where key dimensions can be edited later). It turns iteration from “rebuild the model” into “change 42 mm to 44 mm.”
| If you are making… | Best starting approach | Why it helps beginners |
|---|---|---|
| Clips, brackets, enclosures | Parametric CAD | Easy to adjust fit and wall thickness |
| Figures, cosplay details, art | Sculpting + cleanup | Better control over organic shapes |
| Home decor with precise fit (like lamp parts) | CAD for interfaces, sculpting for style | Keeps critical dimensions reliable |
Design inspiration matters, too. If you are modeling a custom shade, canopy cover, or decorative diffuser, browsing real product proportions can help you avoid awkward shapes. A quick look at collections of modern designer lighting can be useful for reference on silhouettes and scale before you commit to your first version.
Step 4: Model a “boring” V1 on purpose
Your first version should prove the concept, not win a beauty contest.
What to include in V1
- The interface that must fit (holes, slots, clips, mating surfaces)
- The minimum structure needed to hold together
- Only one or two design features you are unsure about
What to skip in V1
- Embossed text, logos, textures
- Perfect chamfers everywhere
- Complex curves you cannot easily edit
This keeps your early prints fast, which means you learn faster.
Step 5: Add “print reality” to your design (DfAM basics)
Design for additive manufacturing (DfAM) is a big topic, but beginners can get most of the benefit from a few fundamentals.
Wall thickness: avoid the fragile zone
Very thin walls look fine on screen and fail in your hand.
- For many everyday functional parts, start thicker than you think, then reduce if needed.
- If the part will be screwed into, clipped, or repeatedly flexed, add more material around stress points.
Because wall thickness depends on the print process and material, it is smart to decide early whether you are targeting FDM (filament), resin, or another process.
Fillets beat sharp corners for strength
Sharp internal corners concentrate stress. Adding fillets (rounded internal corners) is one of the simplest strength upgrades you can make.
Overhangs and supports: design so cleanup is easy
Supports are not “bad,” but they add time and can scar surfaces. A beginner-friendly rule is to place your best-looking surfaces where you will not need supports.
If you want a deeper primer on this topic, Firecloud Printz has a helpful breakdown of supports, overhangs, and tolerances.
Clearances and tolerances: plan for parts to actually fit
Real prints are not perfect. Holes tend to print smaller, and mating parts need breathing room.
A practical approach:
- Treat all “fits” as prototypes first.
- Build in clearance for anything that slides, snaps, or nests.
- For holes that must be precise, consider designing them slightly undersized and drilling to final size.
If you are new to evaluating printability before you print, Firecloud Printz also has a solid checklist on choosing a 3D model for 3D printer success that applies to your own designs too.
Step 6: Export and validate (catch problems before they waste time)
Exporting is not a formality. It is where many beginners accidentally break scale, lose detail, or introduce mesh issues.
STL vs 3MF (beginner guidance)
- STL is widely supported and fine for many projects, but it does not store units or rich metadata.
- 3MF can preserve more information, and many modern slicers handle it well.
If you are unsure, ask your printing partner what they prefer.
Quick validation checklist
Before you print or send a file to a service, do these checks:
- Confirm the model is the correct size in your slicer (sanity check against a known measurement).
- Ensure the mesh is watertight/manifold (no holes, self-intersections).
- Look for thin features that may disappear at your chosen layer height.
- Preview supports and identify surfaces that might get scarred.
Catching these issues in software is dramatically cheaper than discovering them after a 6-hour print.
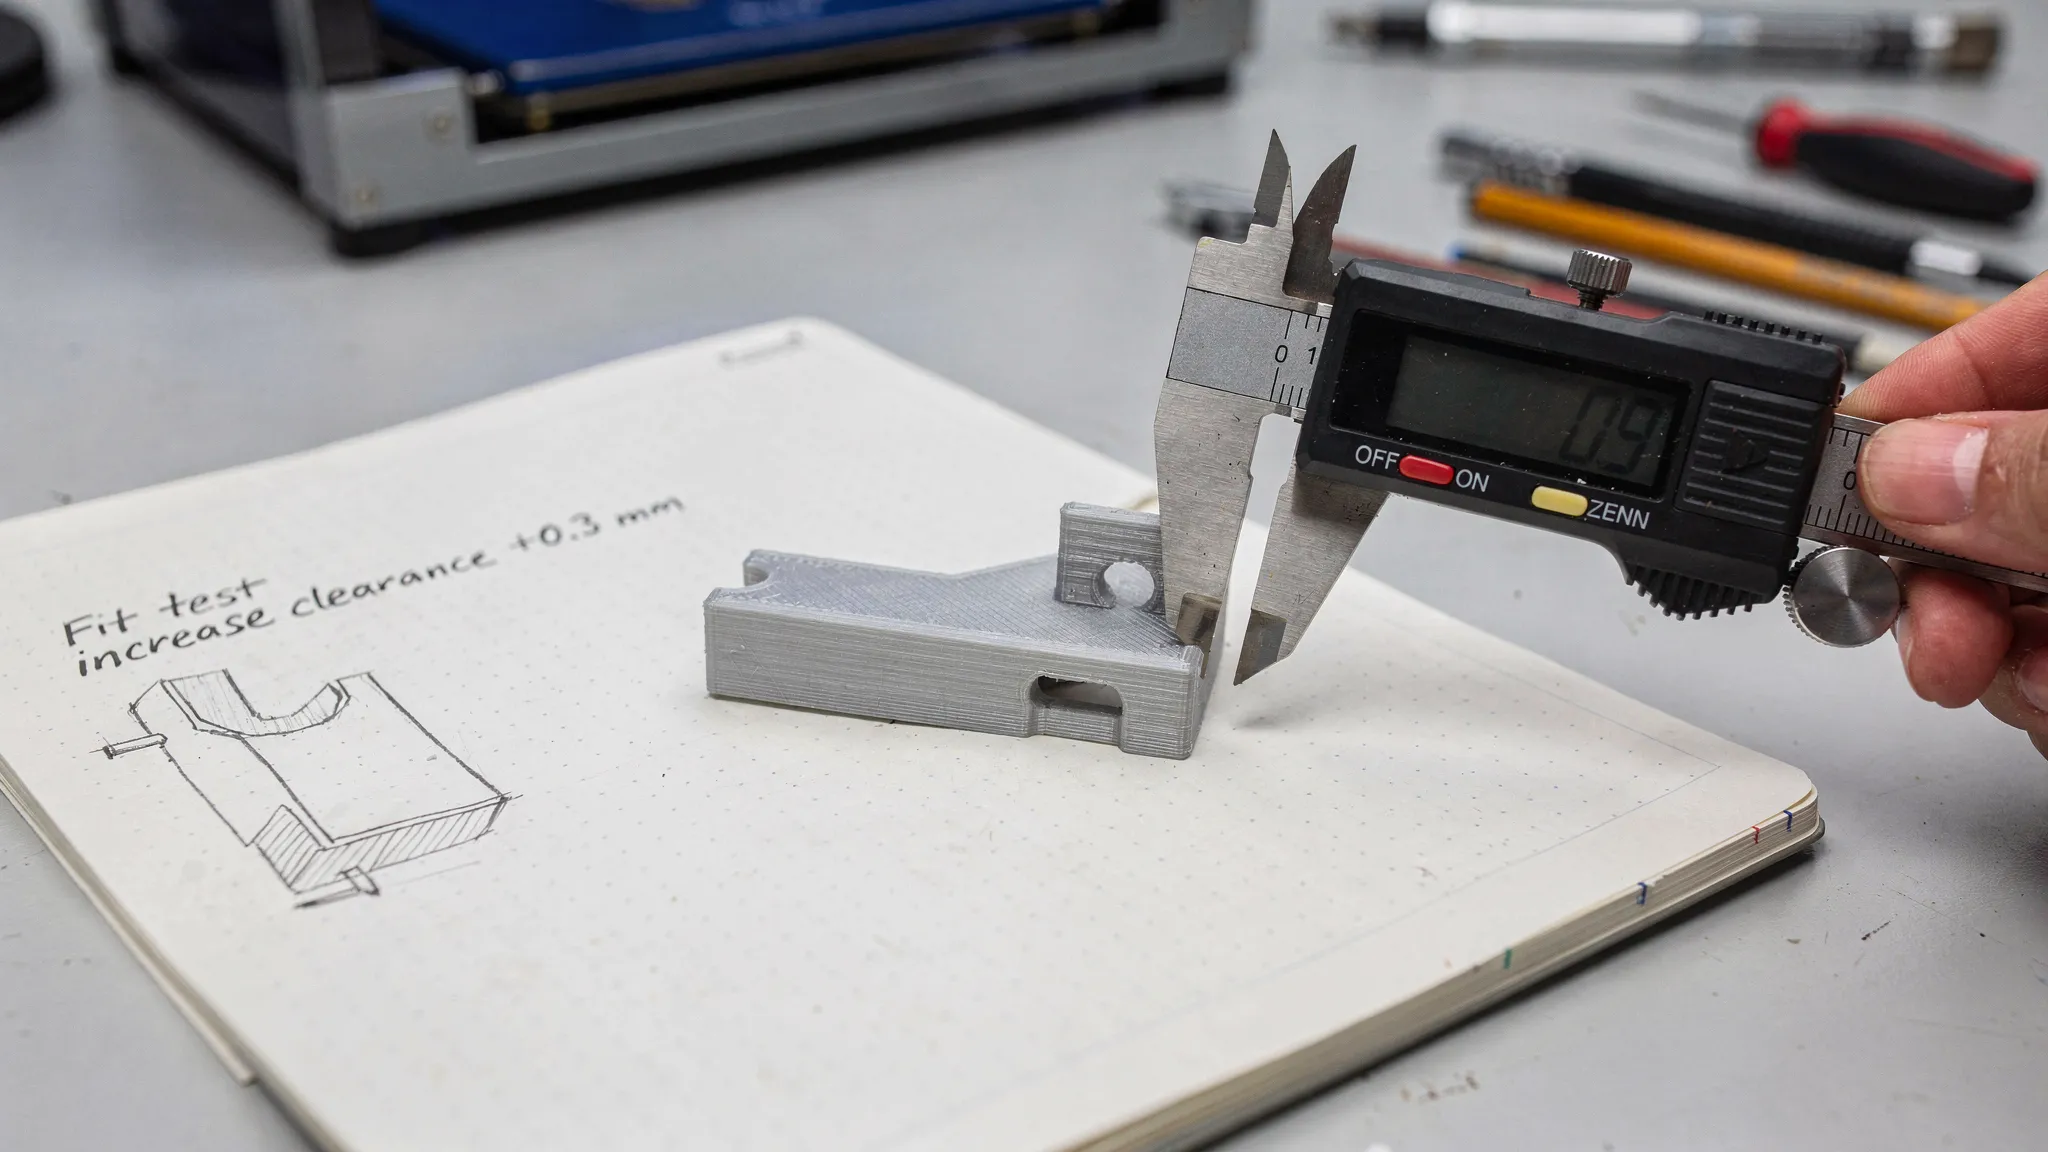
Step 7: Prototype with intention (and write down what you learn)
The print is not the finish line, it is a data-gathering step.
A simple prototype testing routine
Test fit and function immediately, then record:
- What fit too tight or too loose (and by how much)
- What flexed or cracked
- Which surfaces look worse than expected
- Whether assembly steps were annoying (hard to reach screws, sharp edges, awkward orientation)
Take photos of the part installed in the real environment. Your V2 improvements will become obvious.
Make iteration easy by changing one thing at a time
Beginners often change five dimensions and the material at the same time, then they cannot tell what fixed the issue.
For V2, adjust only the top one to three problems. Repeat.
Step 8: Finalize for a better finish (appearance is a design decision)
If you want your part to look “store-bought,” design for finishing, not just printing.
Design choices that make finishing easier
- Put seams and support contact on hidden surfaces.
- Add gentle curves or chamfers where hands touch the part.
- If you plan to sand and paint, avoid ultra-fine engraved details that will disappear.
- If the part will be assembled, consider splitting it where a seam makes visual sense.
When to print yourself vs use a 3D printing service
Printing at home is great for learning and quick prototypes. A service can be the better option when:
- You need high-detail output, consistent repeatability, or a cleaner surface finish.
- You want material options you do not keep at home.
- Your time matters more than experimenting with settings.
- The part is a gift, client deliverable, or display piece where reliability and appearance are the priority.
Firecloud Printz focuses on high-quality custom 3D printing, along with a curated shop of designer-authorized prints. If you already have a file, you can move straight to getting an estimate. If you are still refining the design, you can share notes about size, finish expectations, and how the part will be used so the print setup matches your goal.
Frequently Asked Questions
What is the best beginner software for 3D printing and designing? CAD tools are best for functional parts, while sculpting tools are better for organic shapes. Pick based on the geometry you need, and prioritize parametric editing if you expect fit changes.
How do I know if my design is printable before I print it? Validate scale and geometry in a slicer, check for watertight/manifold meshes, preview supports, and look for thin features that may not survive your layer height or material choice.
Why do my 3D printed parts not fit even when I measured correctly? Real prints have dimensional variation. Holes often print smaller, and mating parts need clearance. Prototype the fit, measure the error, then adjust only the key dimensions for the next version.
Should I export STL or 3MF? STL is universal and often fine, but 3MF can preserve more information and is supported by many modern slicers. If you are sending a file to a print service, ask what format they prefer.
What is the fastest way to improve print strength through design? Add fillets to internal corners, increase thickness around stress points, and avoid thin cantilevers. Strength improvements often come more from geometry than from small setting tweaks.
Bring your first design to life with Firecloud Printz
If you have a model ready (or a V1 prototype you want to improve), Firecloud Printz can help you turn it into a clean, high-detail print with material options and a fast turnaround. Explore the shop for designer-authorized prints, or request a custom order to get an estimate for your file.
Get started at Firecloud Printz.